Guide
OpenClaw Dashboard & Control UI
The OpenClaw Dashboard (Control UI) is your browser-based command center. Chat with your AI agent, configure LLM providers, manage messaging channels, set up automations, and approve actions — all from one interface.
Quick Answer
Fastest way: Download ClawSquire (free), add your server, click Connect — Dashboard opens automatically via localhost. Or run openclaw dashboard in your terminal if OpenClaw is on your local machine. For remote access, use an SSH tunnel: ssh -NL 18789:localhost:18789 user@server.
Access via ClawSquire Desktop App
ClawSquire is a free desktop companion that handles SSH tunneling, authentication, and Dashboard access automatically — no terminal commands needed.
- 1.Add your VPS
Enter your server's IP, SSH user, and credentials. Stored securely in your OS keychain (macOS Keychain / Windows Credential Manager / Linux Secret Service).
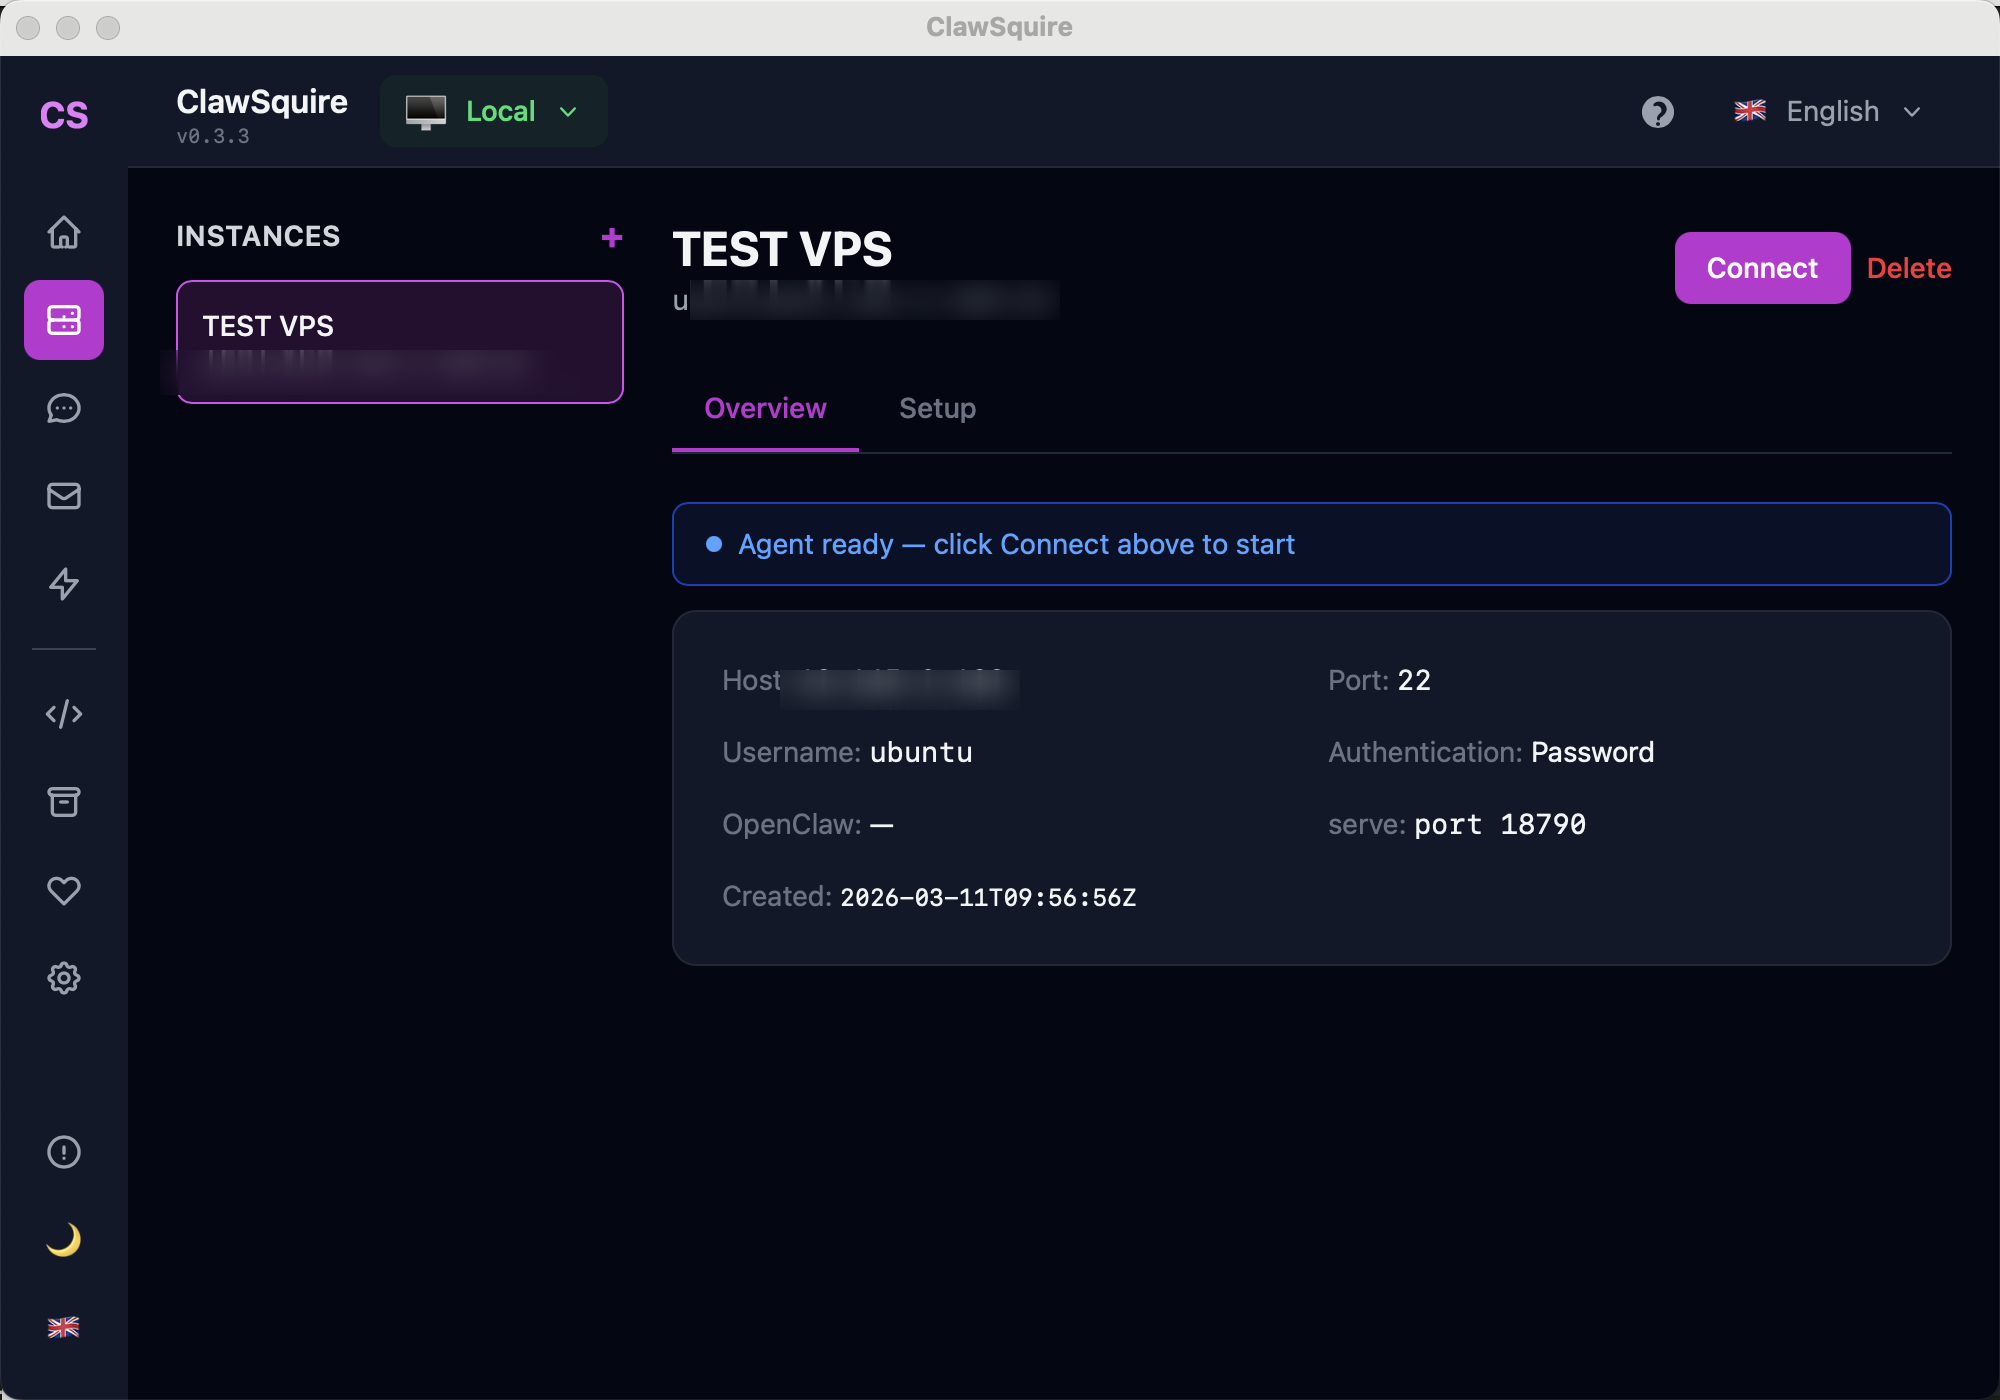
- 2.Click Connect
ClawSquire establishes an encrypted SSH tunnel, forwarding port 18789 to your local machine. No SSH commands to memorize.
- 3.Dashboard opens at localhost
The Dashboard loads in your browser at
localhost:18789— a secure context — so you never encounter the "device identity" error.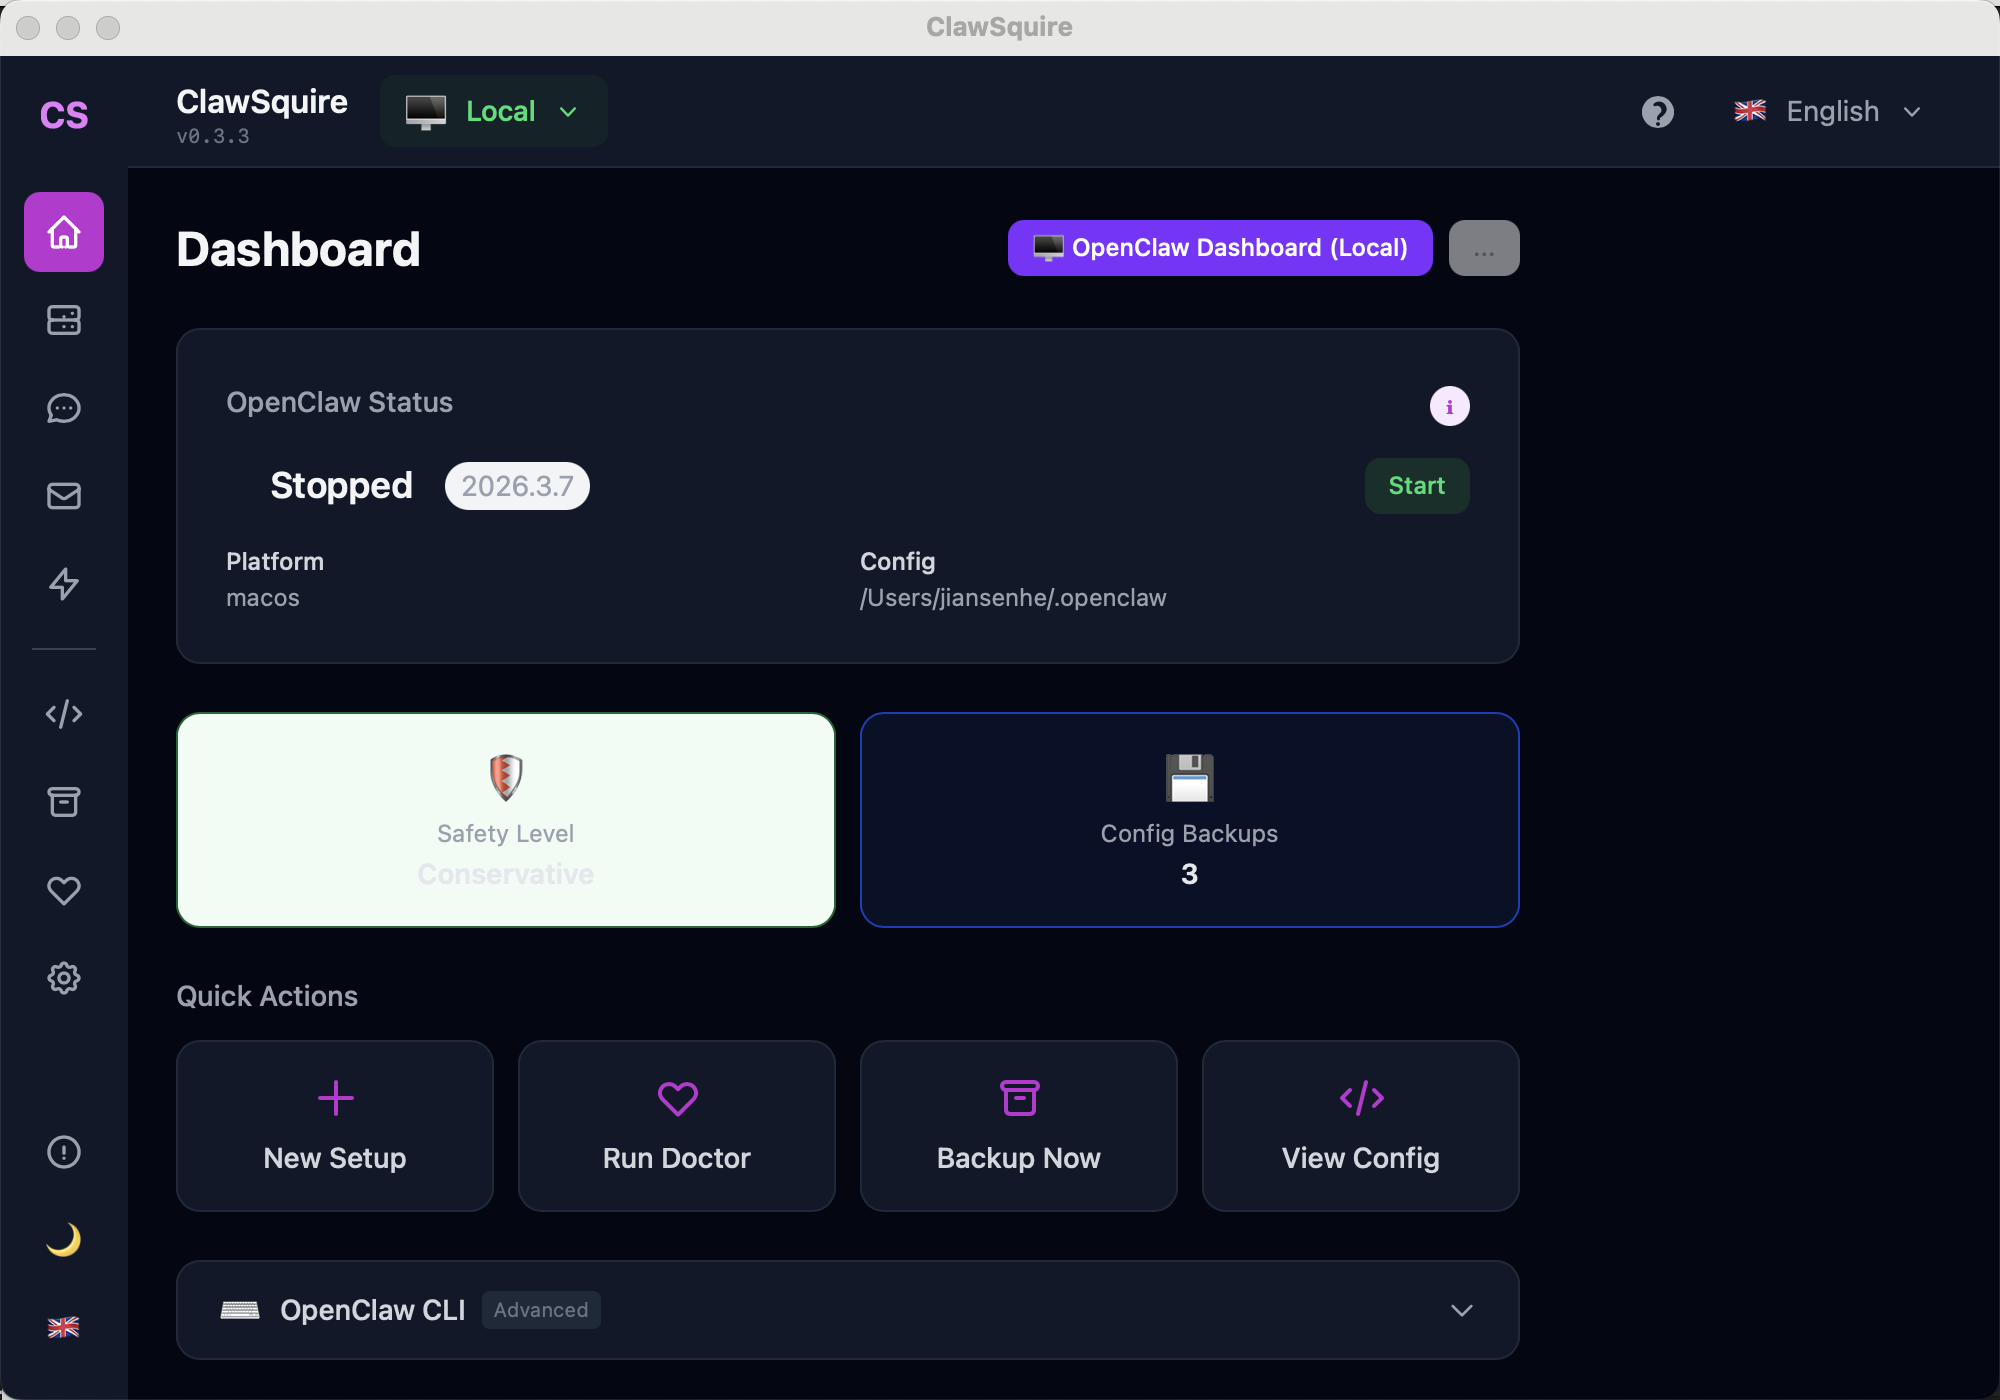
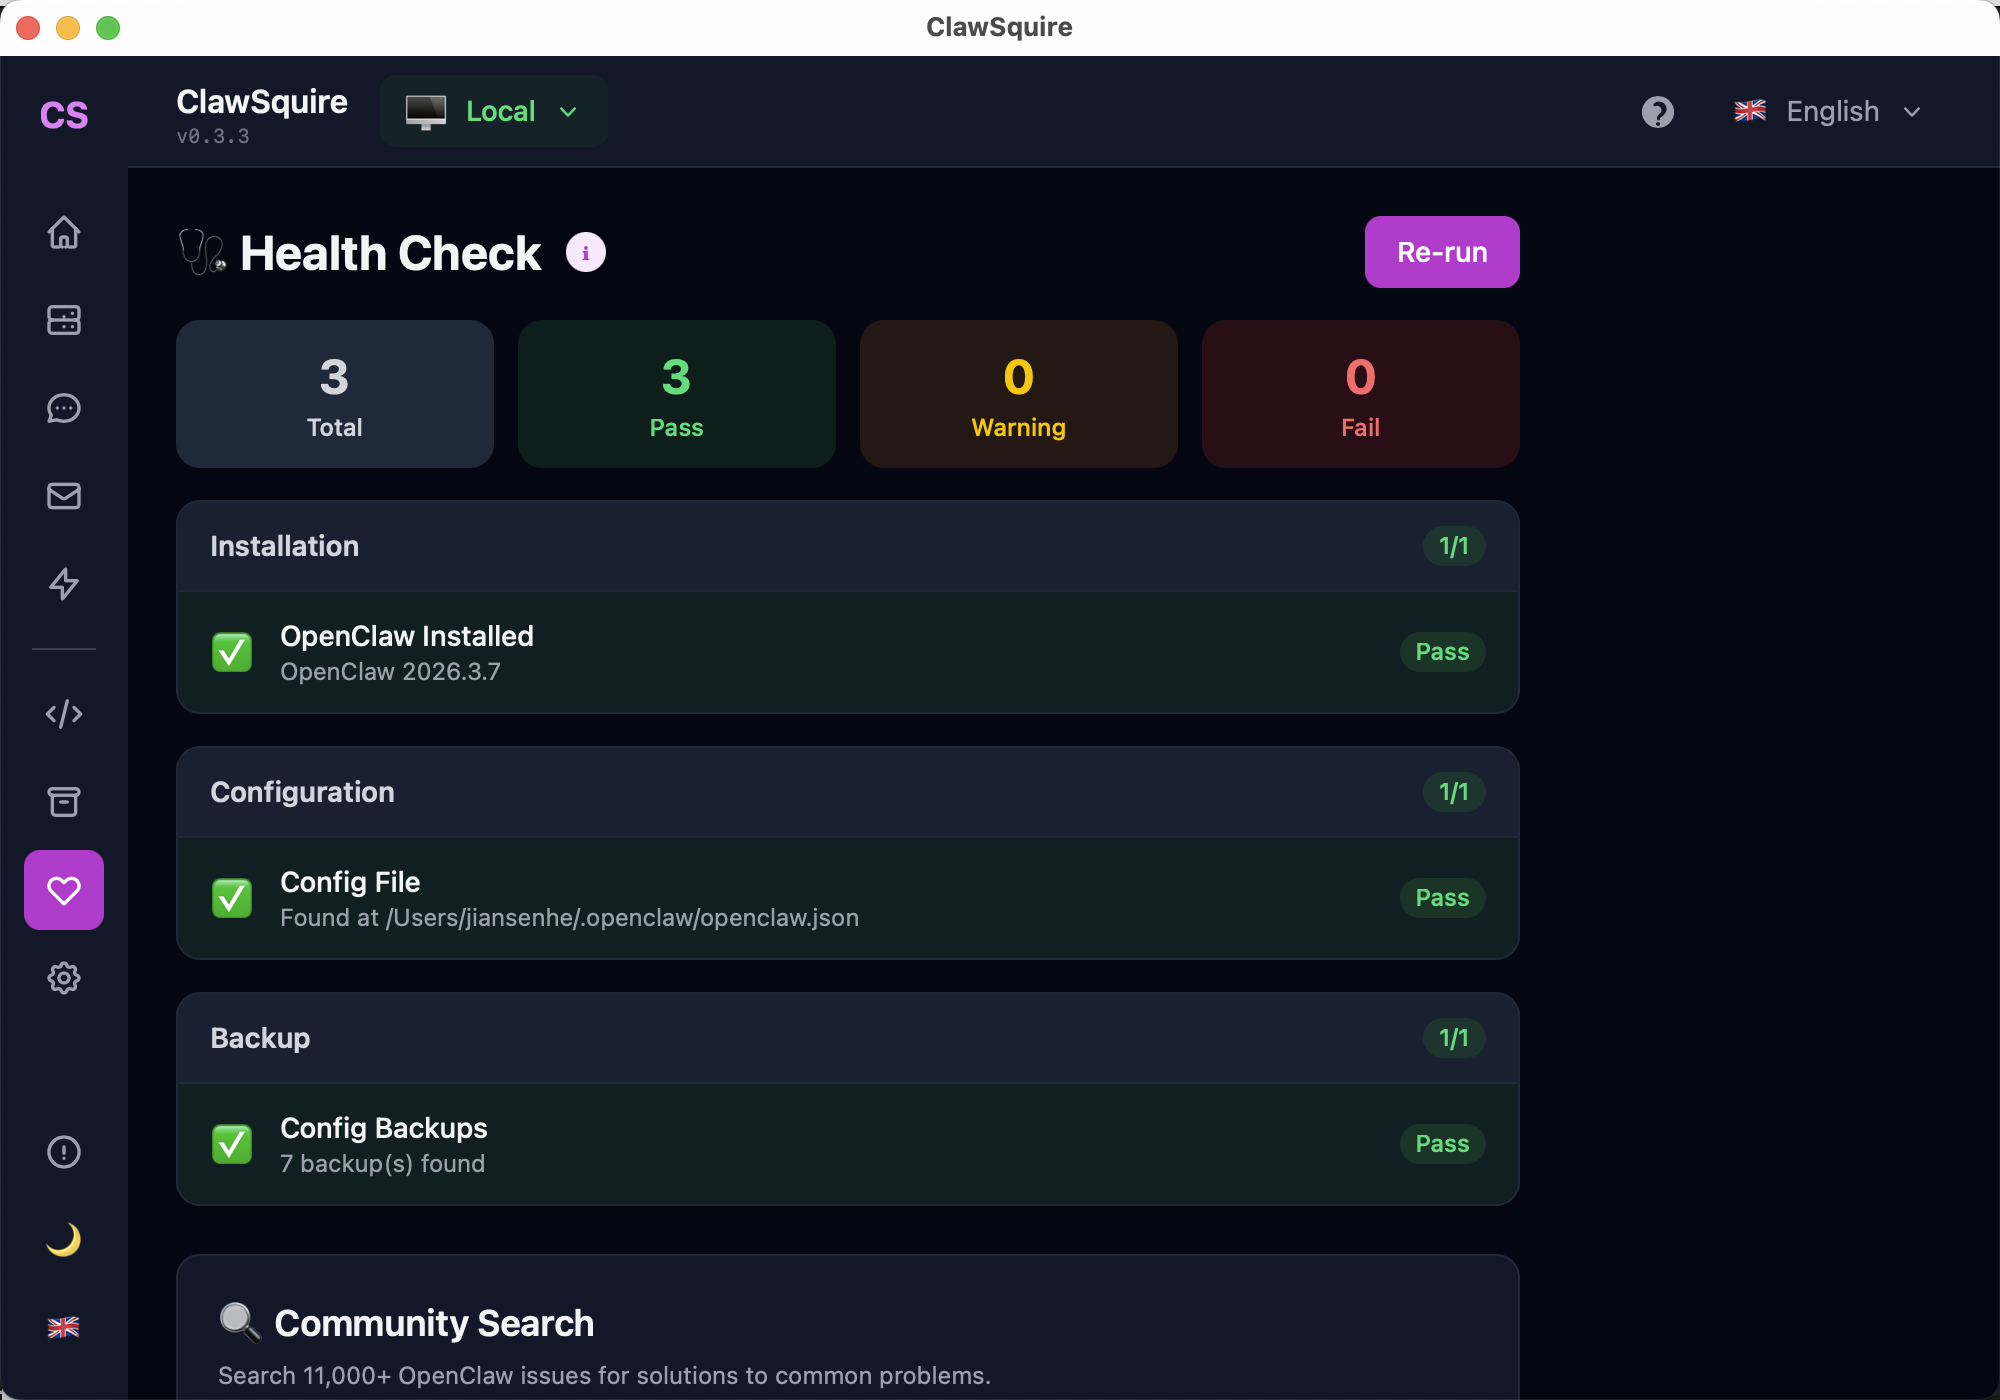
One-click diagnostics for installation, config, and backup status.
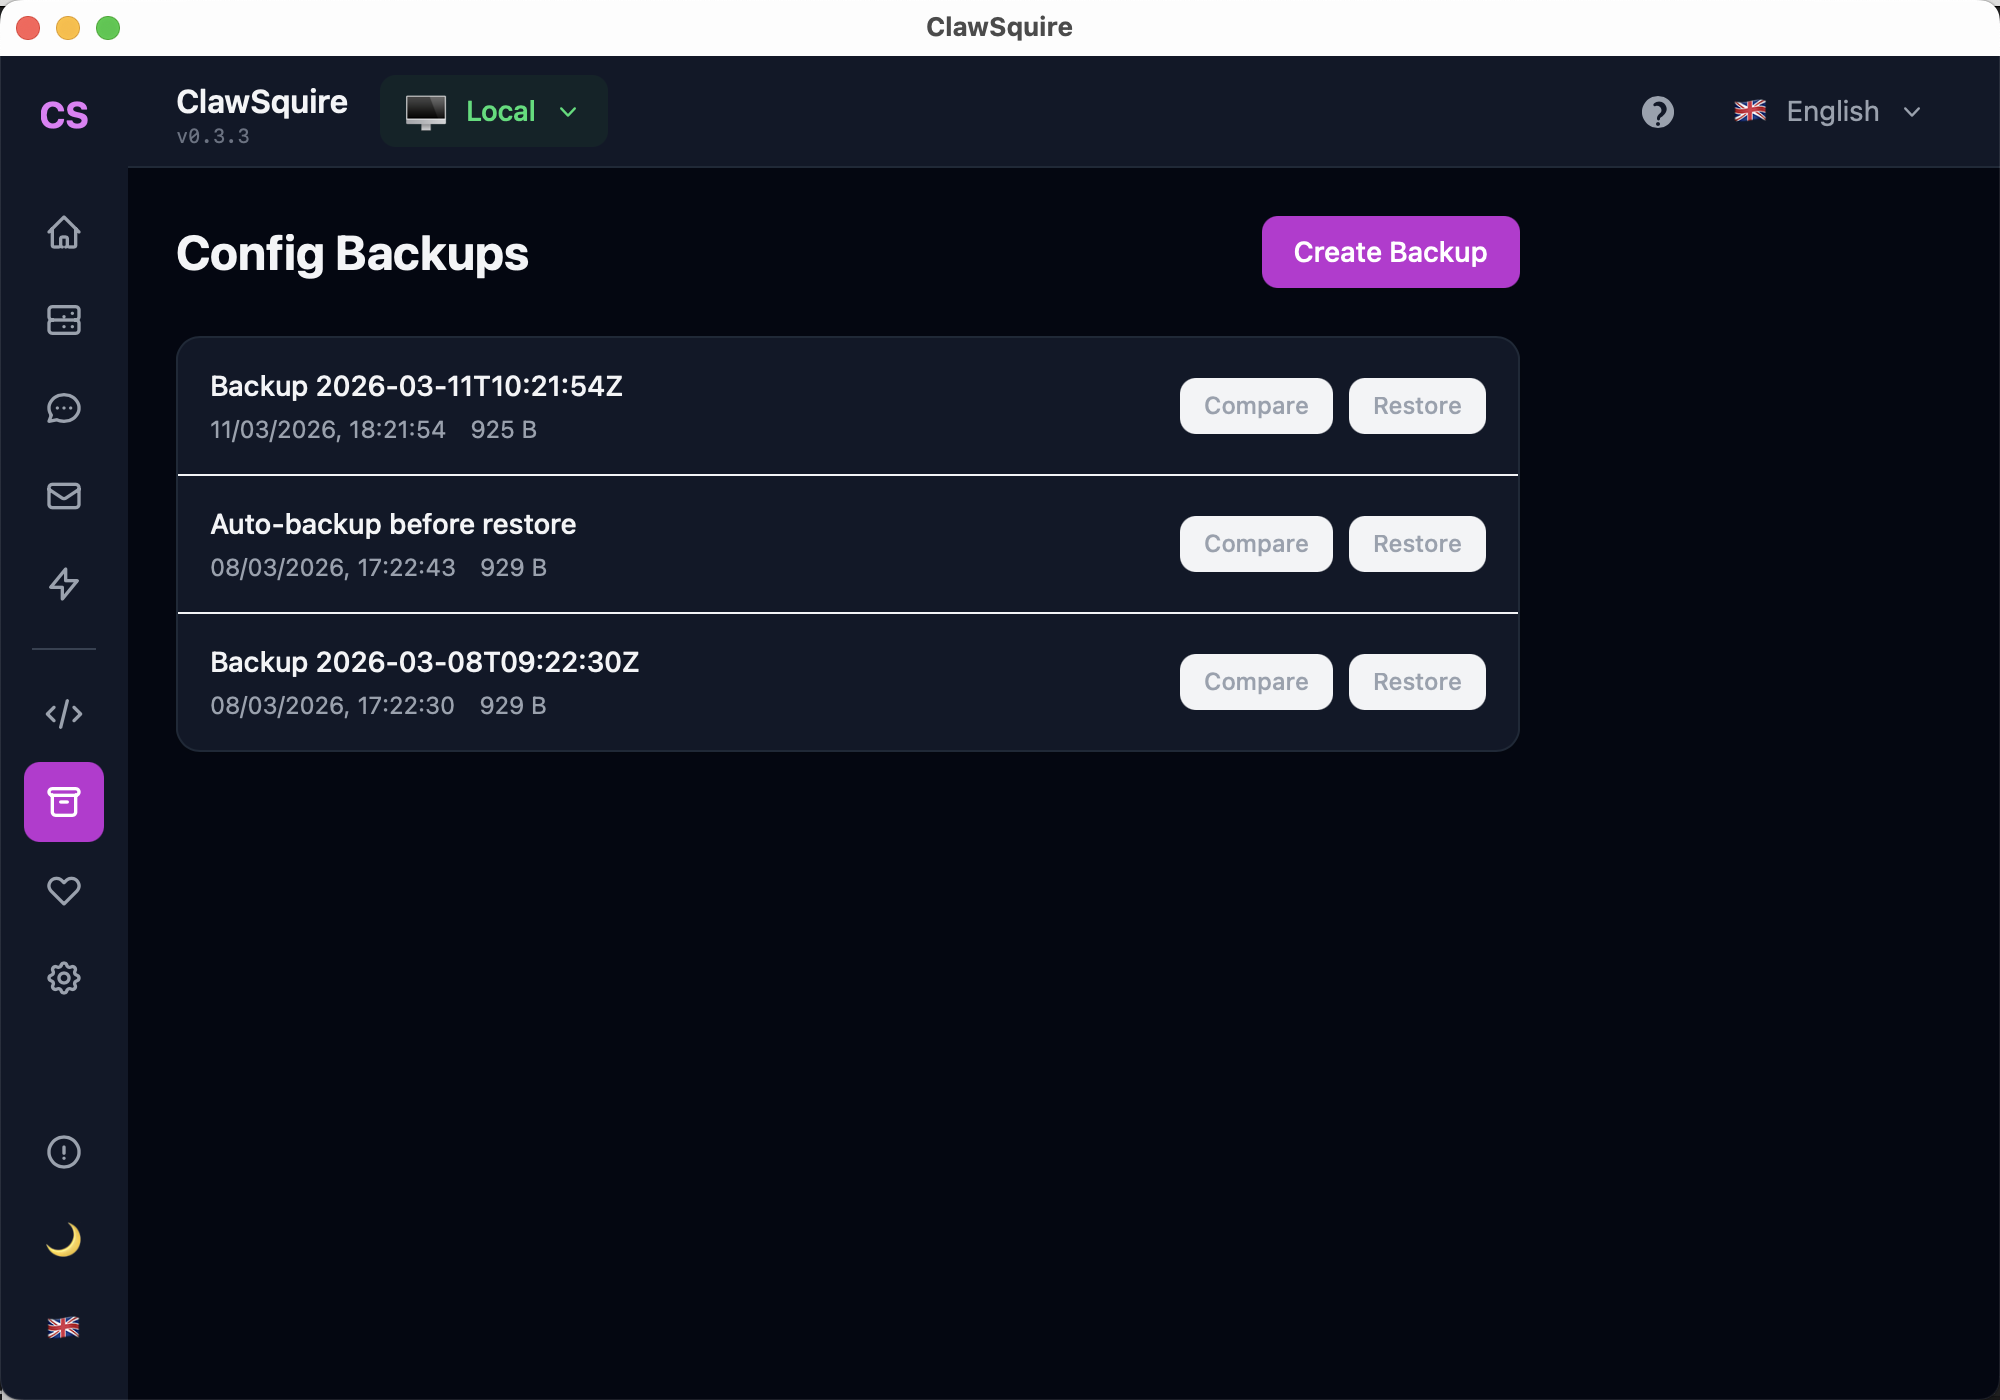
Versioned backups with compare and one-click restore.
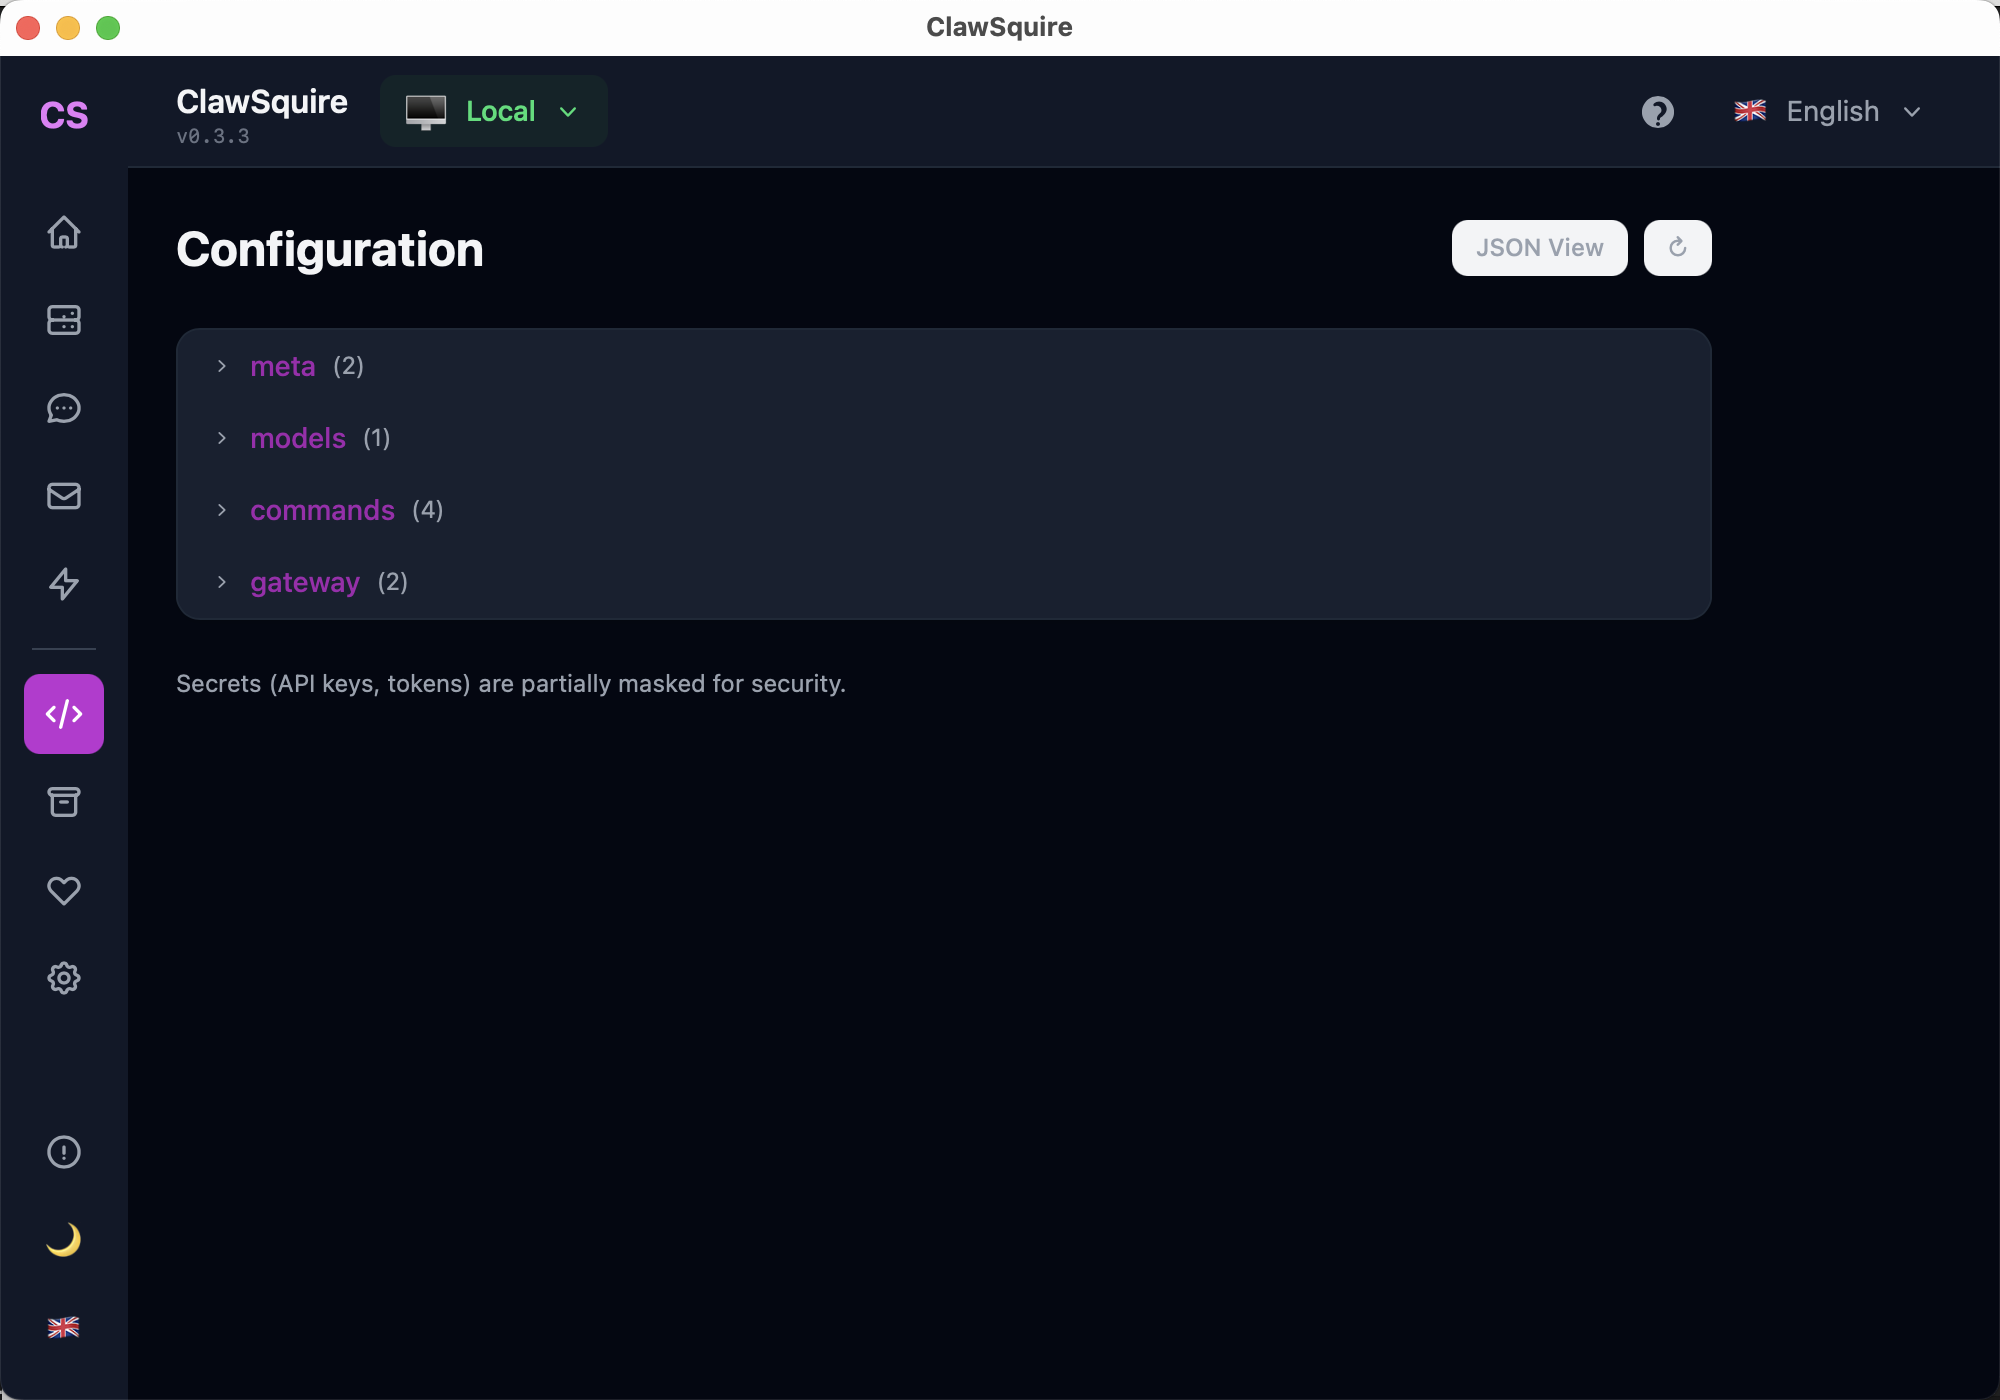
Browse and edit OpenClaw config with a tree viewer. Secrets are masked.
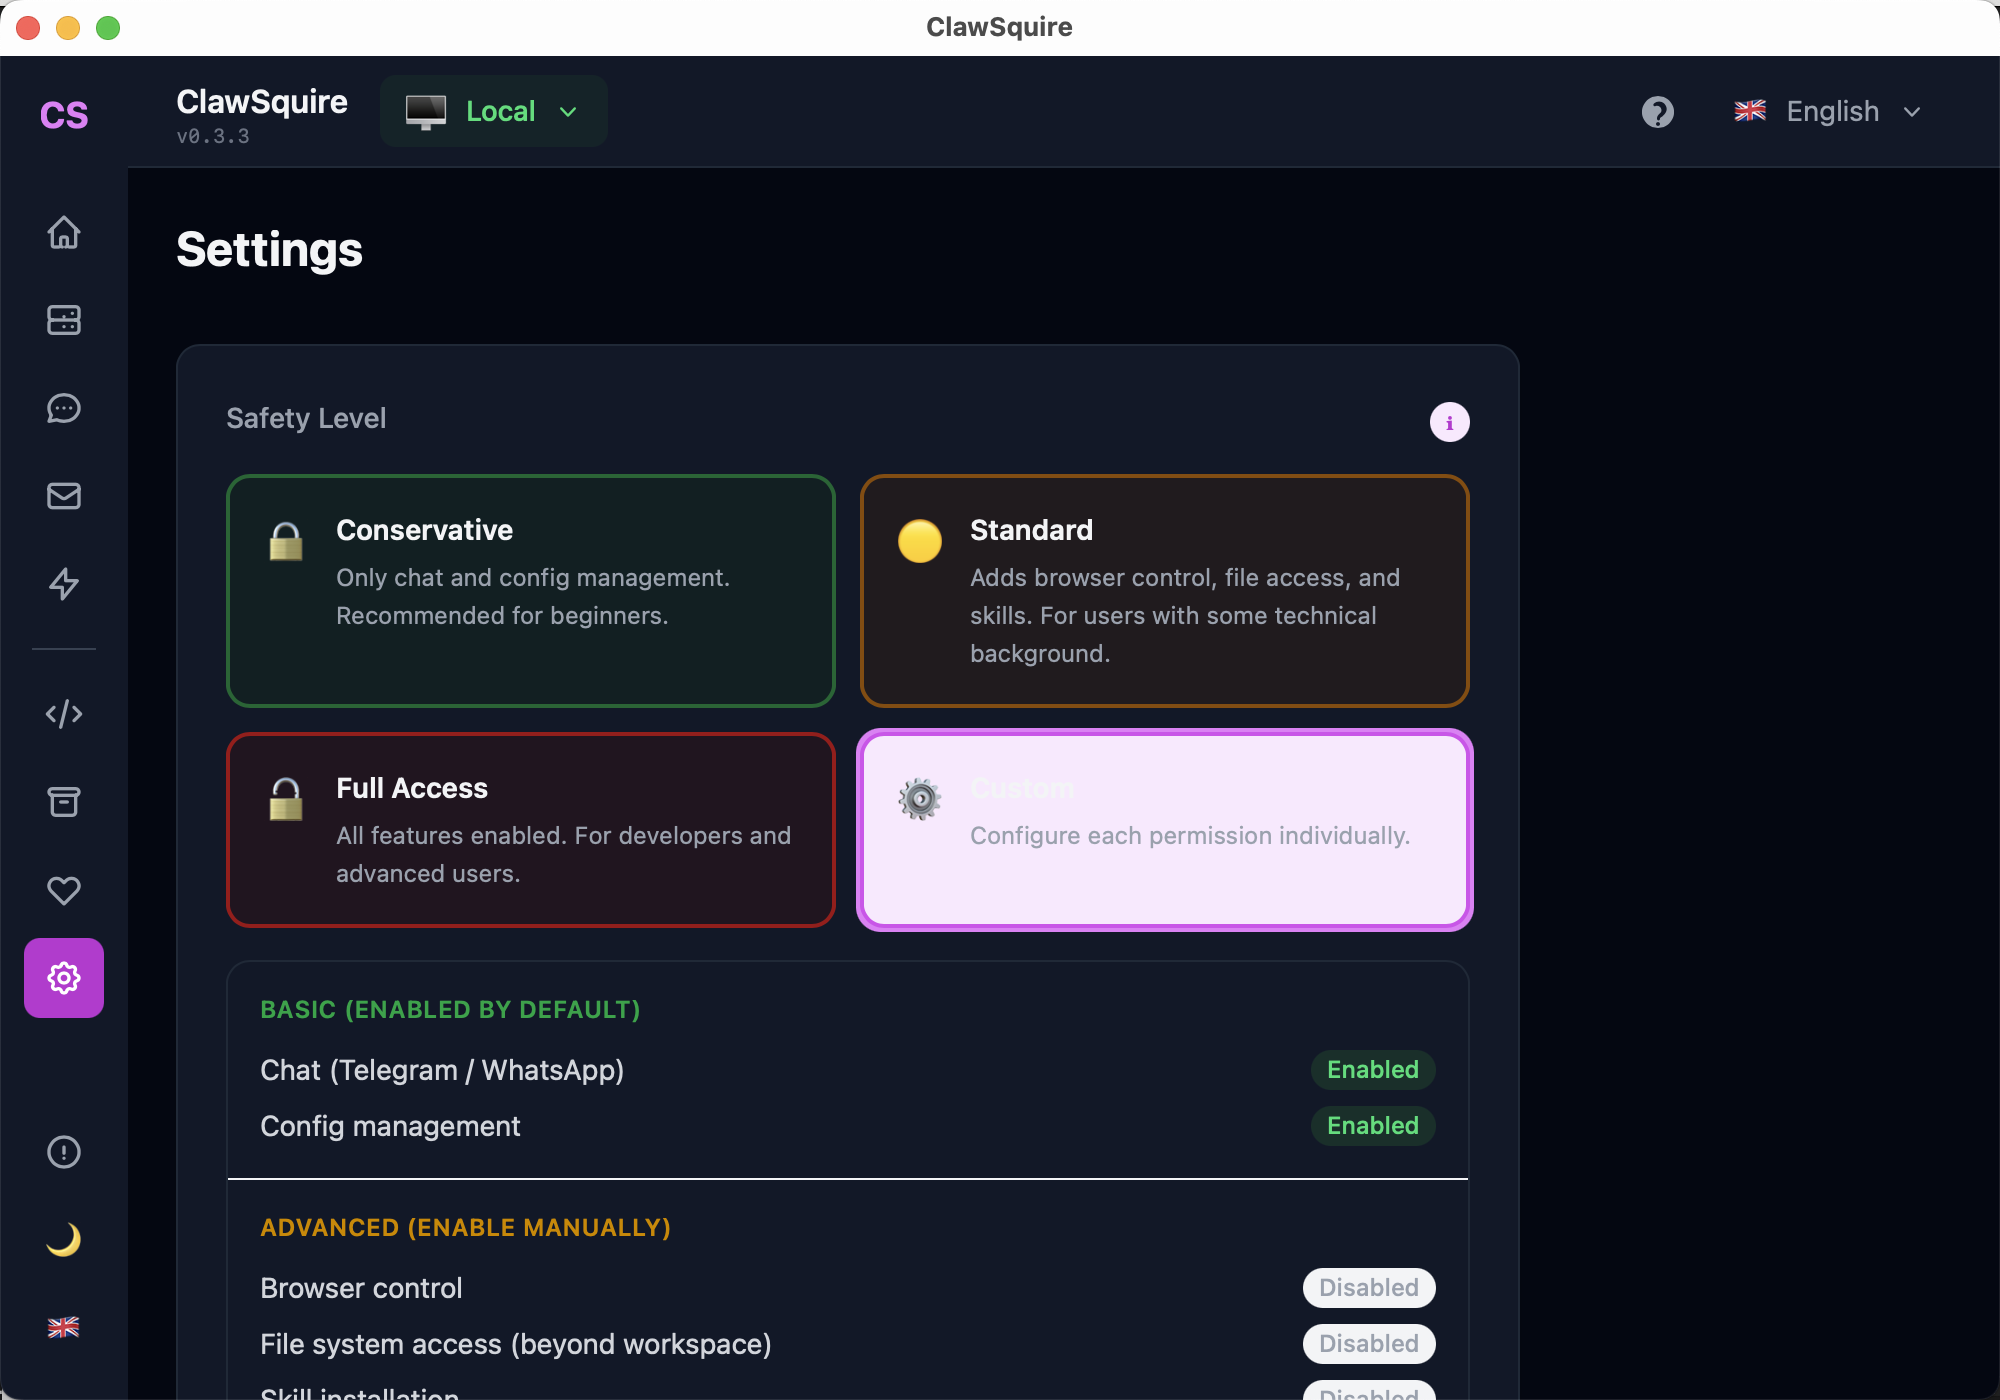
Choose Conservative, Standard, or Full Access permissions for your agent.
Web Dashboard (CLI)
Access the Dashboard directly in your browser using the terminal.
Open the Dashboard
openclaw dashboardThis copies the Dashboard URL to your clipboard and opens your default browser. Default address: http://localhost:18789. You'll need your gateway token to authenticate.
If the gateway isn't running yet:
openclaw serve
# or start only the gateway:
openclaw gateway start
What's in the Dashboard
Chat
Talk to your AI agent directly in the browser. The fastest way to test without setting up Telegram or WhatsApp. Supports full conversation context with session isolation.
Tip: Use multiple sessions to keep different conversation topics separate.
Configuration
Edit OpenClaw settings visually: default model, provider API keys, gateway auth, system prompts, and more. Changes are saved to openclaw.json.
Most changes require a gateway restart to take effect: openclaw gateway restart
Channels
View and manage connected messaging platforms (Telegram, WhatsApp, Discord, Gmail). See connection status, pairing codes, and channel-specific settings.
The Channels page shows QR codes for WhatsApp pairing — no need to use the terminal.
Cron Jobs (Automations)
Create scheduled tasks that run on a timer. Examples: daily email summaries, periodic web scraping, health report generation. Uses standard cron syntax.
Sessions
Browse conversation sessions across all channels. Each session maintains isolated context so the agent remembers conversation history within a session.
Skills
View installed skills (SKILL.md files) that extend your agent's capabilities. Skills define specialized behaviors, tool access, and knowledge domains.
Execution Approvals
When the agent wants to perform a high-risk action (like sending an email, running a destructive command, or accessing the file system), it pauses and asks for your approval here.
Set approval sensitivity in ClawSquire via Settings → Safety Level.
Remote Access (VPS / Server)
If OpenClaw runs on a VPS or remote server, you need a secure way to access the Dashboard from your local machine. Never expose port 18789 to the public internet.
Easiest: Use ClawSquire
ClawSquire handles SSH tunneling automatically. Add your VPS → Click Connect → Done. No terminal commands needed. Download free →
Option A: SSH Tunnel (most common manual method)
# Open tunnel — keep this running
ssh -N -L 18789:127.0.0.1:18789 user@your-server-ip

# Now open in your browser:
# http://localhost:18789

# To run in background:
ssh -fN -L 18789:127.0.0.1:18789 user@your-server-ip
-N = no remote command, -f = background, -L = local port forwarding. The tunnel encrypts all traffic between your machine and the server.
Option B: Tailscale (zero-config VPN)
Install Tailscale on both your local machine and the server. They join the same private network.
# Find your server's Tailscale IP:
tailscale ip -4   # on the server

# Access from your machine:
# http://100.x.y.z:18789
Tailscale uses WireGuard encryption. The Dashboard recognizes Tailscale IPs as trusted, so the device identity error doesn't appear. Add the Tailscale IP to allowedOrigins if needed.
Option C: Reverse Proxy with HTTPS (Caddy / Nginx)
For production setups with a custom domain, use a reverse proxy with automatic TLS. See our detailed guides:
Frequently Asked Questions
"Control UI requires device identity — use HTTPS or localhost"+
Dashboard shows a blank white page+
"Disconnected from gateway" — WebSocket keeps dropping+
allowedOrigins error when accessing from a different hostname+
Config changes in the Dashboard don't take effect+
Can't access the Dashboard remotely even with SSH tunnel+
How do I change the Dashboard port from 18789?+
Related Guides
- → Fix "Device Identity" Error — detailed HTTPS / secure context guide
- → Gateway Token — find and manage your authentication token
- → VPS Setup — install OpenClaw on a remote server
- → Troubleshooting — diagnose common OpenClaw issues
- → CLI Reference — all OpenClaw commands
- → Health Check — run diagnostics