Guide
Install OpenClaw on Windows
Three ways to get OpenClaw running on Windows 10 or 11. Choose the method that fits your comfort level.
Quick Answer
Install OpenClaw on Windows: 1) Install Node.js 20+ from nodejs.org, 2) Open PowerShell, 3) Run npm install -g openclaw. Or download ClawSquire for a guided setup.
Choose your method
⟩Method A: ClawSquire GUI
ClawSquire provides a guided Windows installation experience. After install, verify with Health Check.
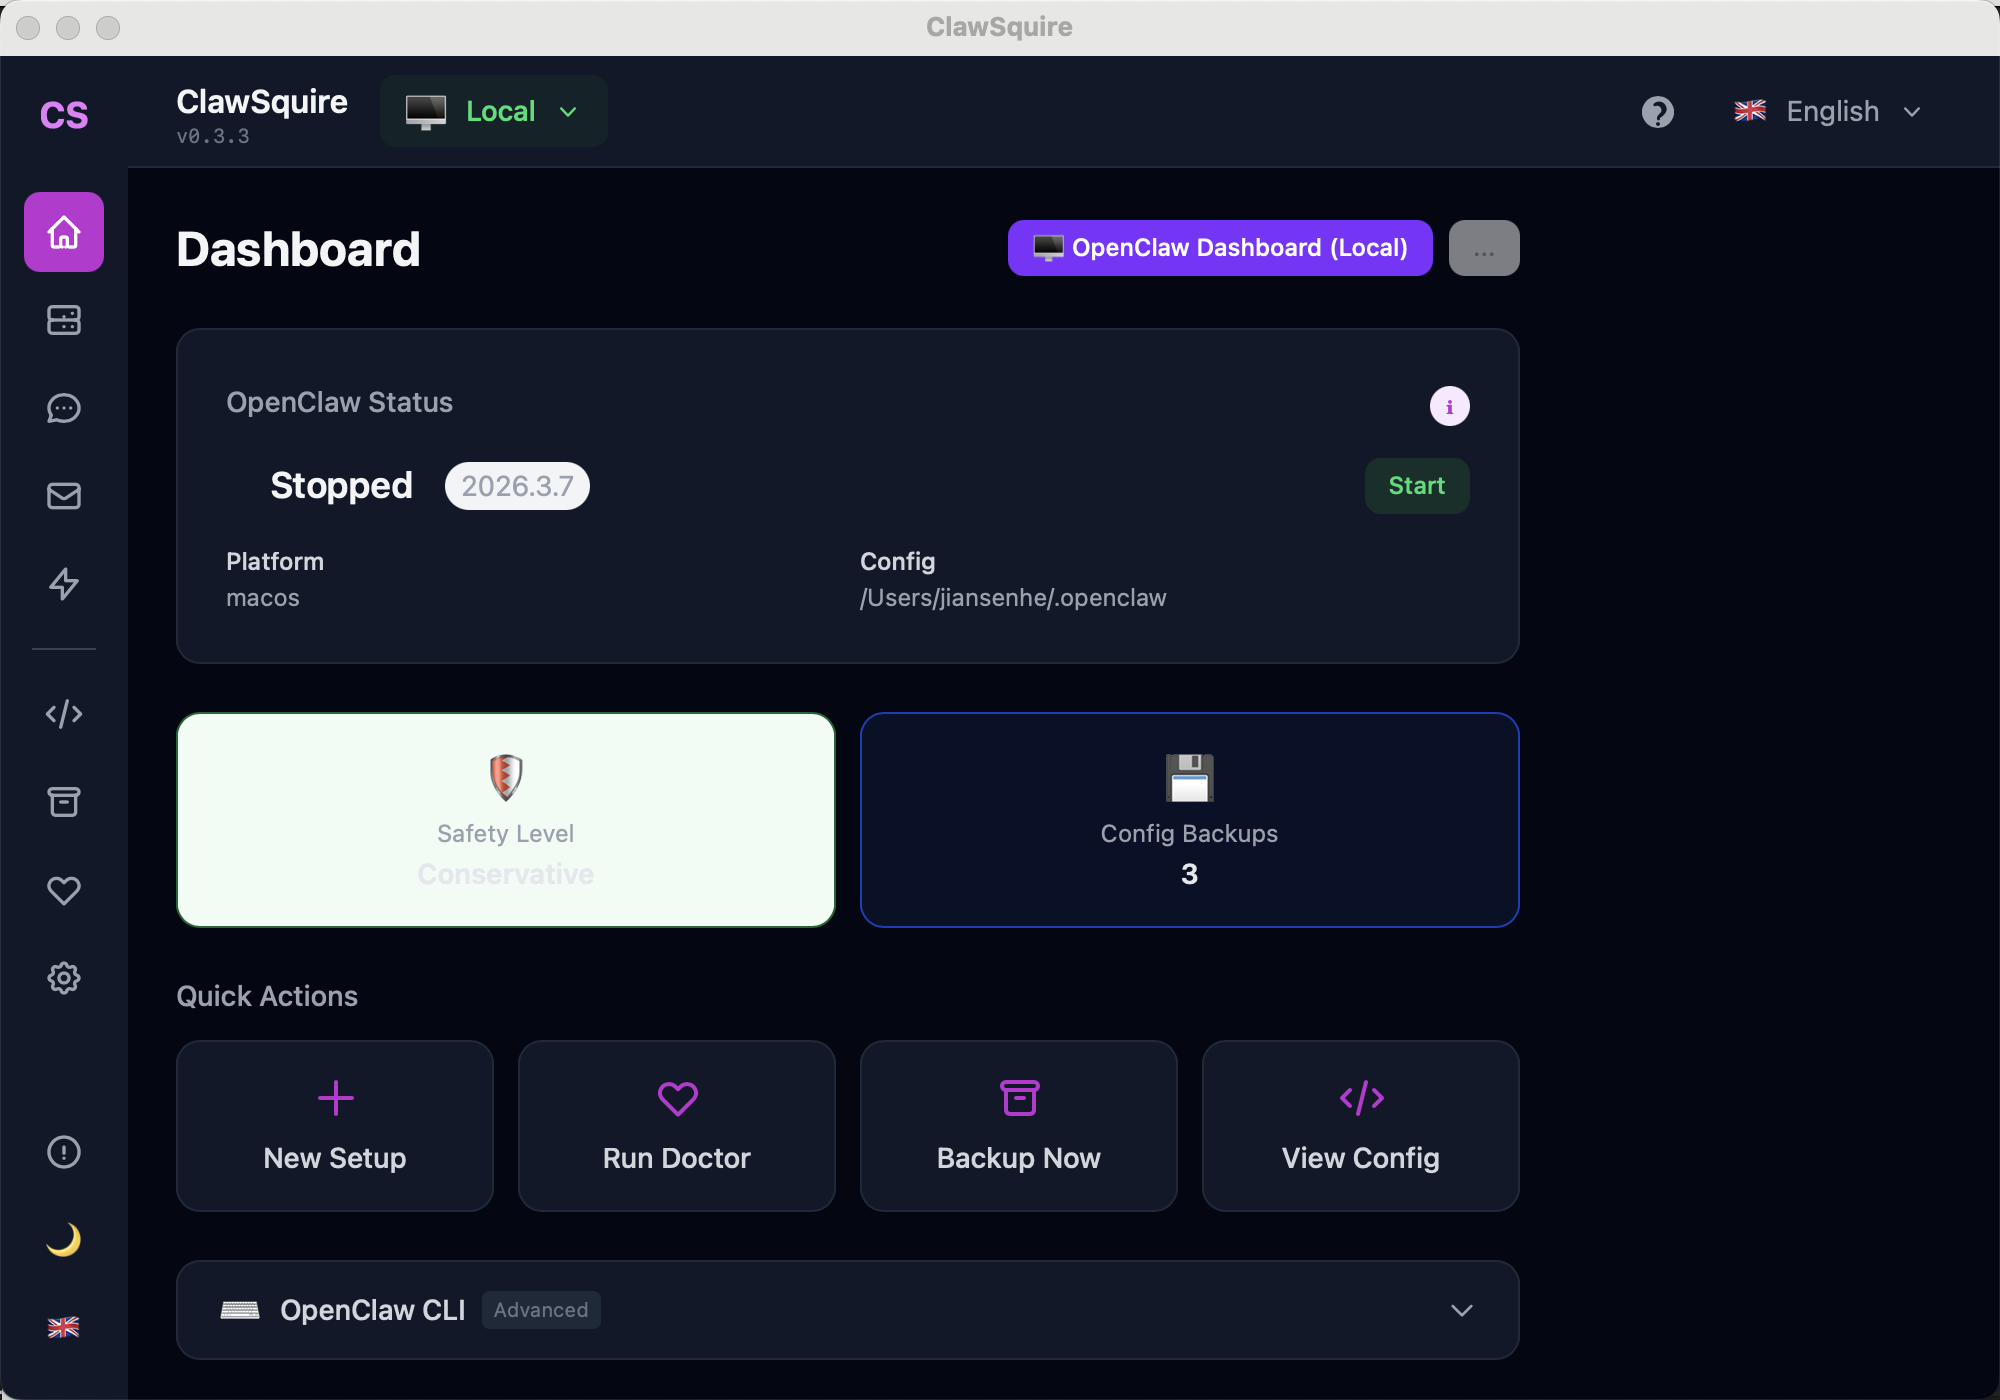
ClawSquire Dashboard
After installation, the Dashboard shows OpenClaw version, status, and quick actions.
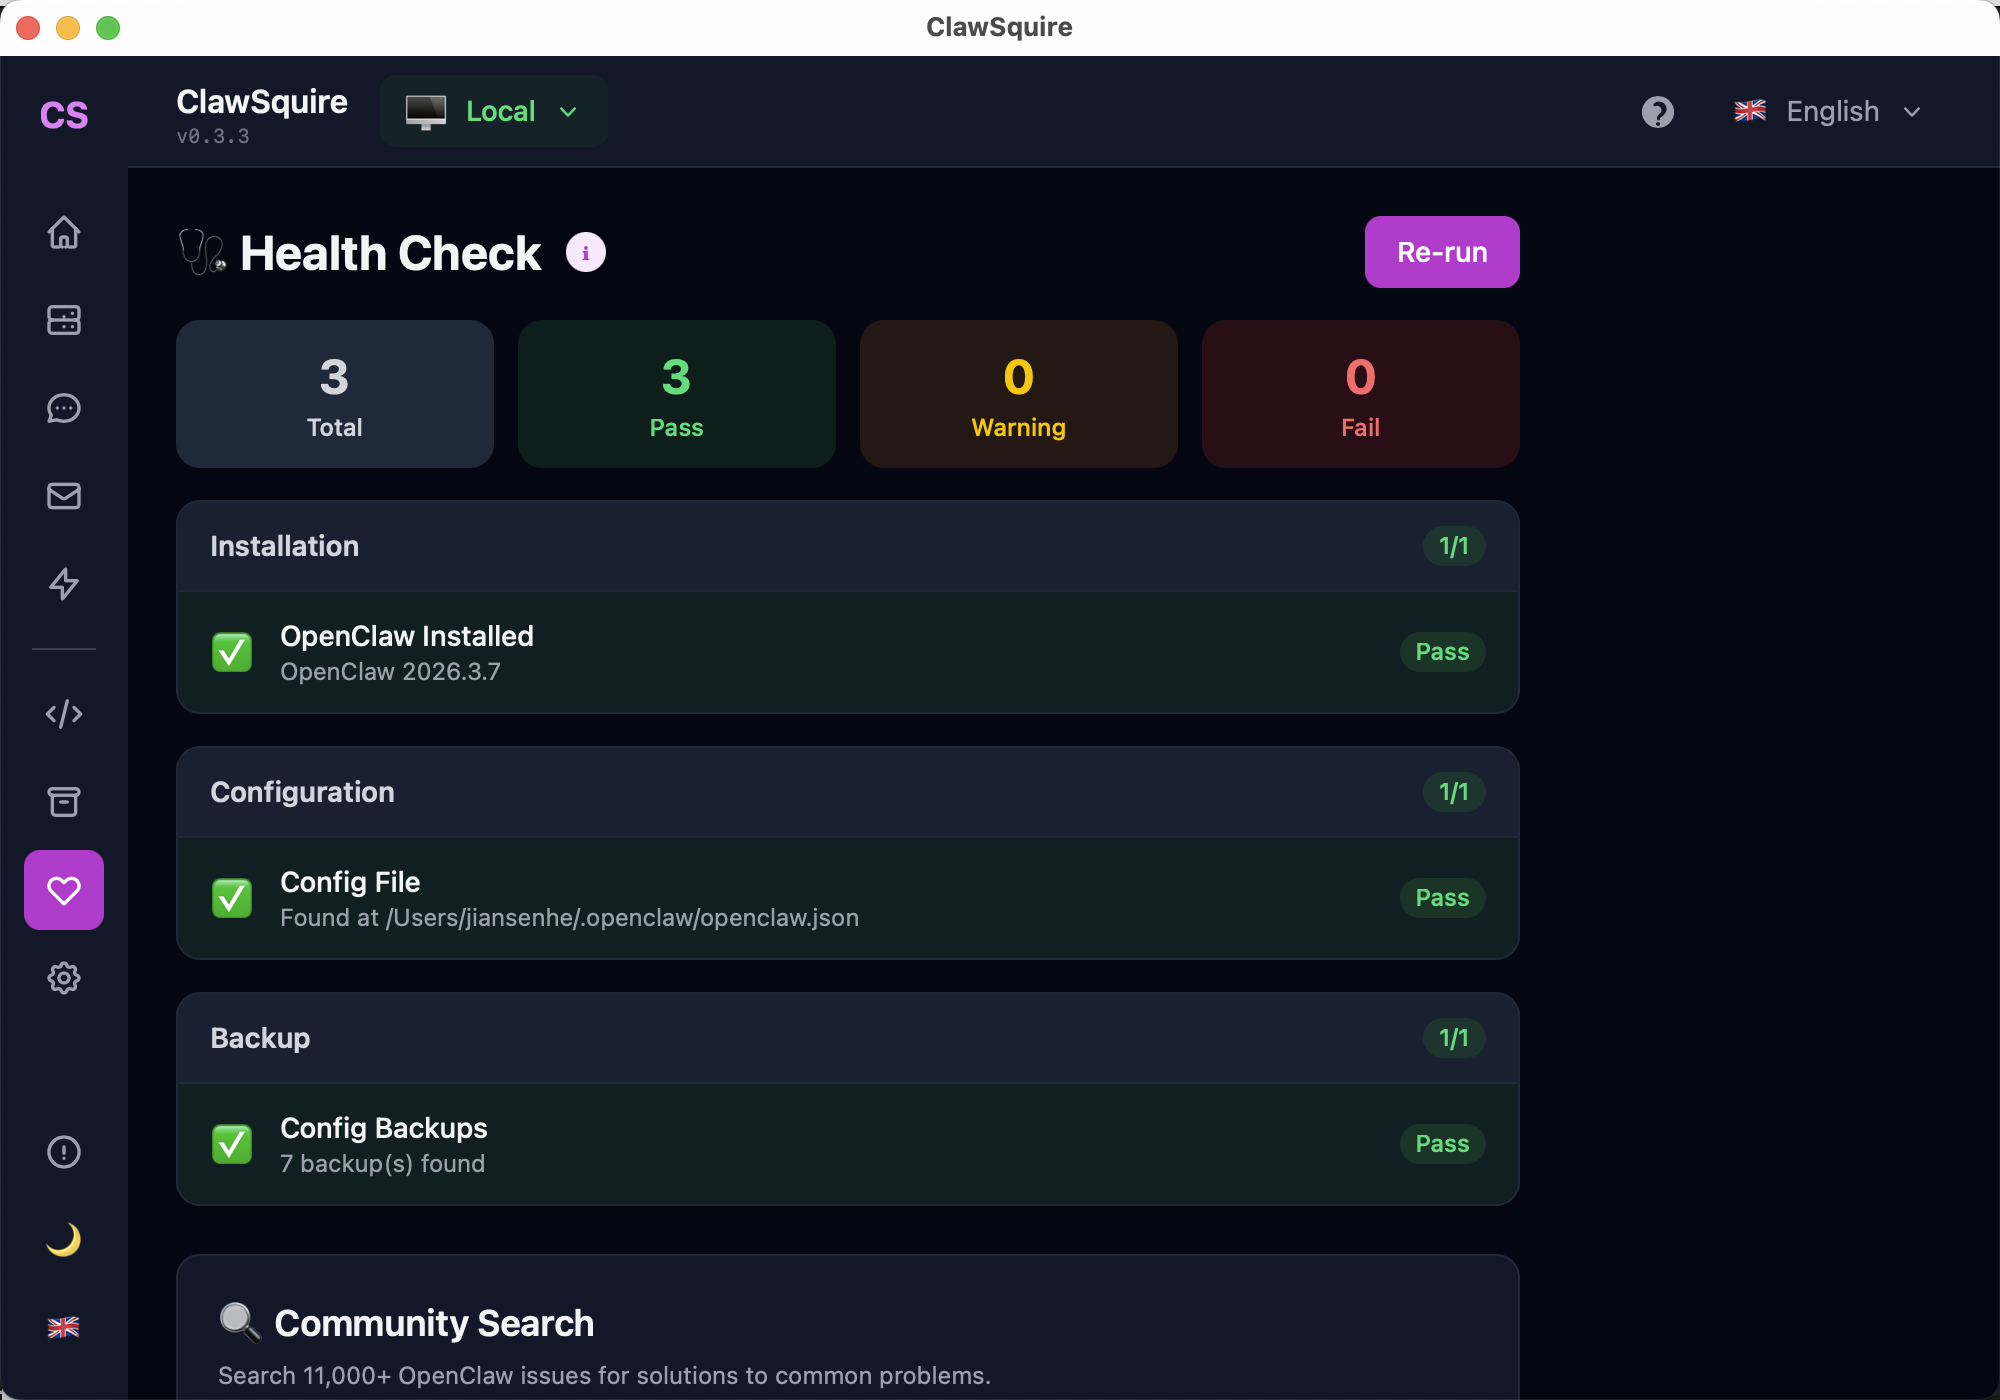
Health Check after install
Run Health Check to verify your OpenClaw installation on Windows.
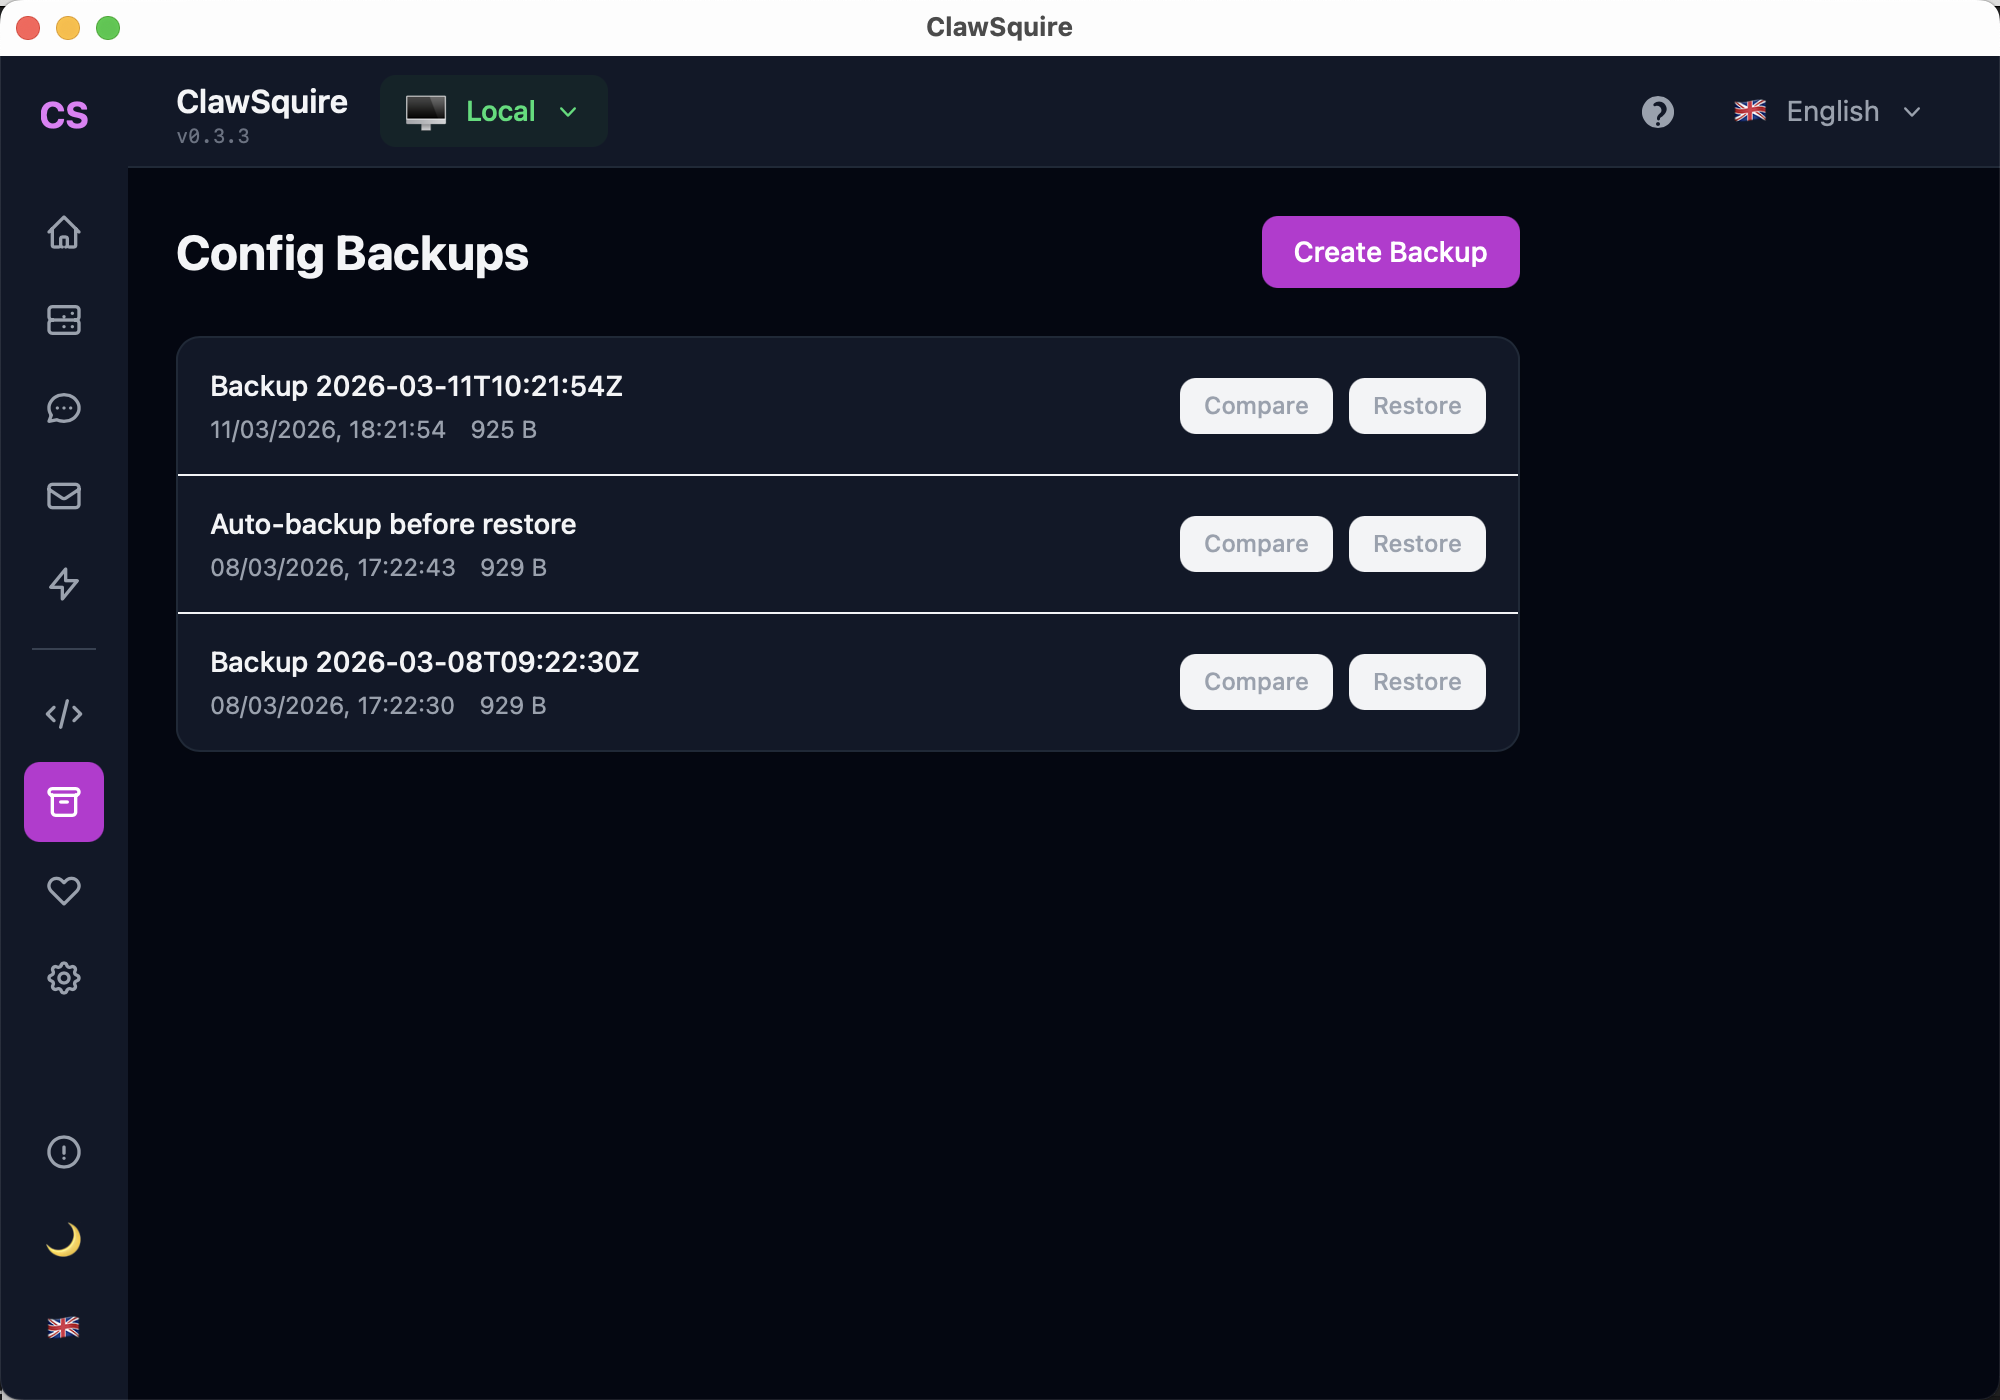
Config Backups
ClawSquire lets you create and restore config backups — useful before making changes.
Download ClawSquire for Windows
Go to clawsquire.com and download the Windows installer (.msi or .exe). Supports Windows 10 version 1809 and later.
Run the installer
Double-click the downloaded file. Windows SmartScreen may show a warning — click More info → Run anyway. ClawSquire is open-source and code-signed.
Follow the setup wizard
ClawSquire automatically detects if OpenClaw is installed. If not, click Install OpenClaw and it handles Node.js, npm, and OpenClaw installation for you.
Choose your language (English, 简体中文, 日本語, etc.) and configure your LLM provider through the visual wizard.
Done!
ClawSquire shows a health check. If everything is green, your OpenClaw agent is ready. Connect Telegram or start chatting directly.
Manual Alternative
Install OpenClaw via PowerShell or WSL2 from the terminal.
⟩Method B: PowerShell (Direct)
Install Node.js
OpenClaw requires Node.js 22 or later. Download from nodejs.org or use winget:
# Using winget (Windows Package Manager)
winget install OpenJS.NodeJS.LTS

# Verify
node --versionSet execution policy
Open PowerShell as Administrator and allow script execution:
Set-ExecutionPolicy -ExecutionPolicy RemoteSigned -Scope CurrentUserInstall OpenClaw
Run the official install script:
iwr -useb https://openclaw.ai/install.ps1 | iexOr install via npm directly:
npm install -g openclaw

# Verify
openclaw --versionRun onboarding
openclaw onboard --install-daemonThis runs interactive setup: creates config files, generates a gateway token, and optionally installs the gateway as a Windows service.
Start the gateway
openclaw gatewayAccess the Dashboard at http://localhost:18789.
⟩Method C: WSL2 (Recommended by OpenClaw team)
Enable WSL2
Open PowerShell as Administrator:
wsl --install

# Restart your computer when prompted
This installs WSL2 with Ubuntu by default. After restart, set up a Linux username and password.
Install OpenClaw in WSL
Open Ubuntu (WSL) from Start Menu and run:
curl -fsSL https://openclaw.ai/install.sh | bashThis installs Node.js, npm, and OpenClaw inside the Linux environment.
Start and access
# Start gateway
openclaw gateway

# Open dashboard (access from Windows browser)
# URL: http://localhost:18789
WSL2 shares networking with Windows, so you can access the dashboard from your regular Windows browser.
Windows Troubleshooting
"openclaw" is not recognized as a command
Node.js global bin directory is not in PATH. Close and reopen PowerShell, or add it manually: the path is usually C:\Users\<you>\AppData\Roaming\npm.
Execution policy error when running scripts
Run: Set-ExecutionPolicy -ExecutionPolicy RemoteSigned -Scope CurrentUser
Port 18789 already in use
Another process is using the port. Find it with: netstat -ano | findstr 18789, then kill or use a different port: openclaw gateway --port 18790
Dashboard shows 'Unauthorized'
Generate a fresh token: openclaw doctor --generate-gateway-token — then paste it in the Dashboard.
Windows Firewall blocks OpenClaw
Allow Node.js through Windows Firewall when prompted. OpenClaw only needs localhost access by default.
🔒 Worried about security?
Running an AI agent on your main Windows PC is a valid concern. Many users prefer installing OpenClaw on a separate VPS (cloud server) and managing it remotely from their desktop.
ClawSquire supports this workflow: install it on your Windows PC as the management console, connect to a remote OpenClaw instance via SSH tunnel, and control everything visually without the agent running on your personal machine. See our VPS setup guide for details.