Guide
How to Install OpenClaw
OpenClaw is an open-source AI agent platform that runs LLM-powered assistants locally. This guide covers two methods: using the ClawSquire GUI (recommended for beginners) or the terminal.
Quick Answer
To install OpenClaw: Easiest — download ClawSquire from clawsquire.com, run it, and follow the wizard (install OpenClaw, configure LLM, connect channels, run Health Check). CLI — run npm install -g openclaw, then openclaw doctor and openclaw gateway. After CLI install, use ClawSquire for visual management and remote VPS control.
Choose your method
⟩Method 1: Install with ClawSquire (GUI)
★ Recommended: Use ClawSquire
No terminal needed. ClawSquire guides you through install, LLM setup, and Health Check — all visually.
Download ClawSquire
Go to clawsquire.com and download the installer for your operating system. Available for macOS (Apple Silicon & Intel), Windows 10+, and Linux.
Open and Choose Your Language
Launch ClawSquire. On first start, pick from 7 languages: English, 简体中文, 繁體中文, 日本語, Español, Deutsch, or Português. The entire app adapts.
Install OpenClaw
ClawSquire checks if OpenClaw is installed. If not, click Install OpenClaw and follow the wizard. It downloads and sets up OpenClaw automatically.
Configure an LLM Provider
Go to the LLM Setup Wizard. Choose a provider (DeepSeek, OpenAI, Gemini, Anthropic, etc.), enter your API key, and select a model. ClawSquire validates the key before saving.
💡 Budget-friendly recommendation
DeepSeek is the cheapest option for reasoning tasks. Gemini offers a free tier. OpenAI is best for image understanding.
Connect a Channel (Optional)
Set up Telegram, WhatsApp, Discord, or Gmail to chat with your AI agent. Telegram is the easiest to start: create a bot via @BotFather, paste the token, and send /pair.
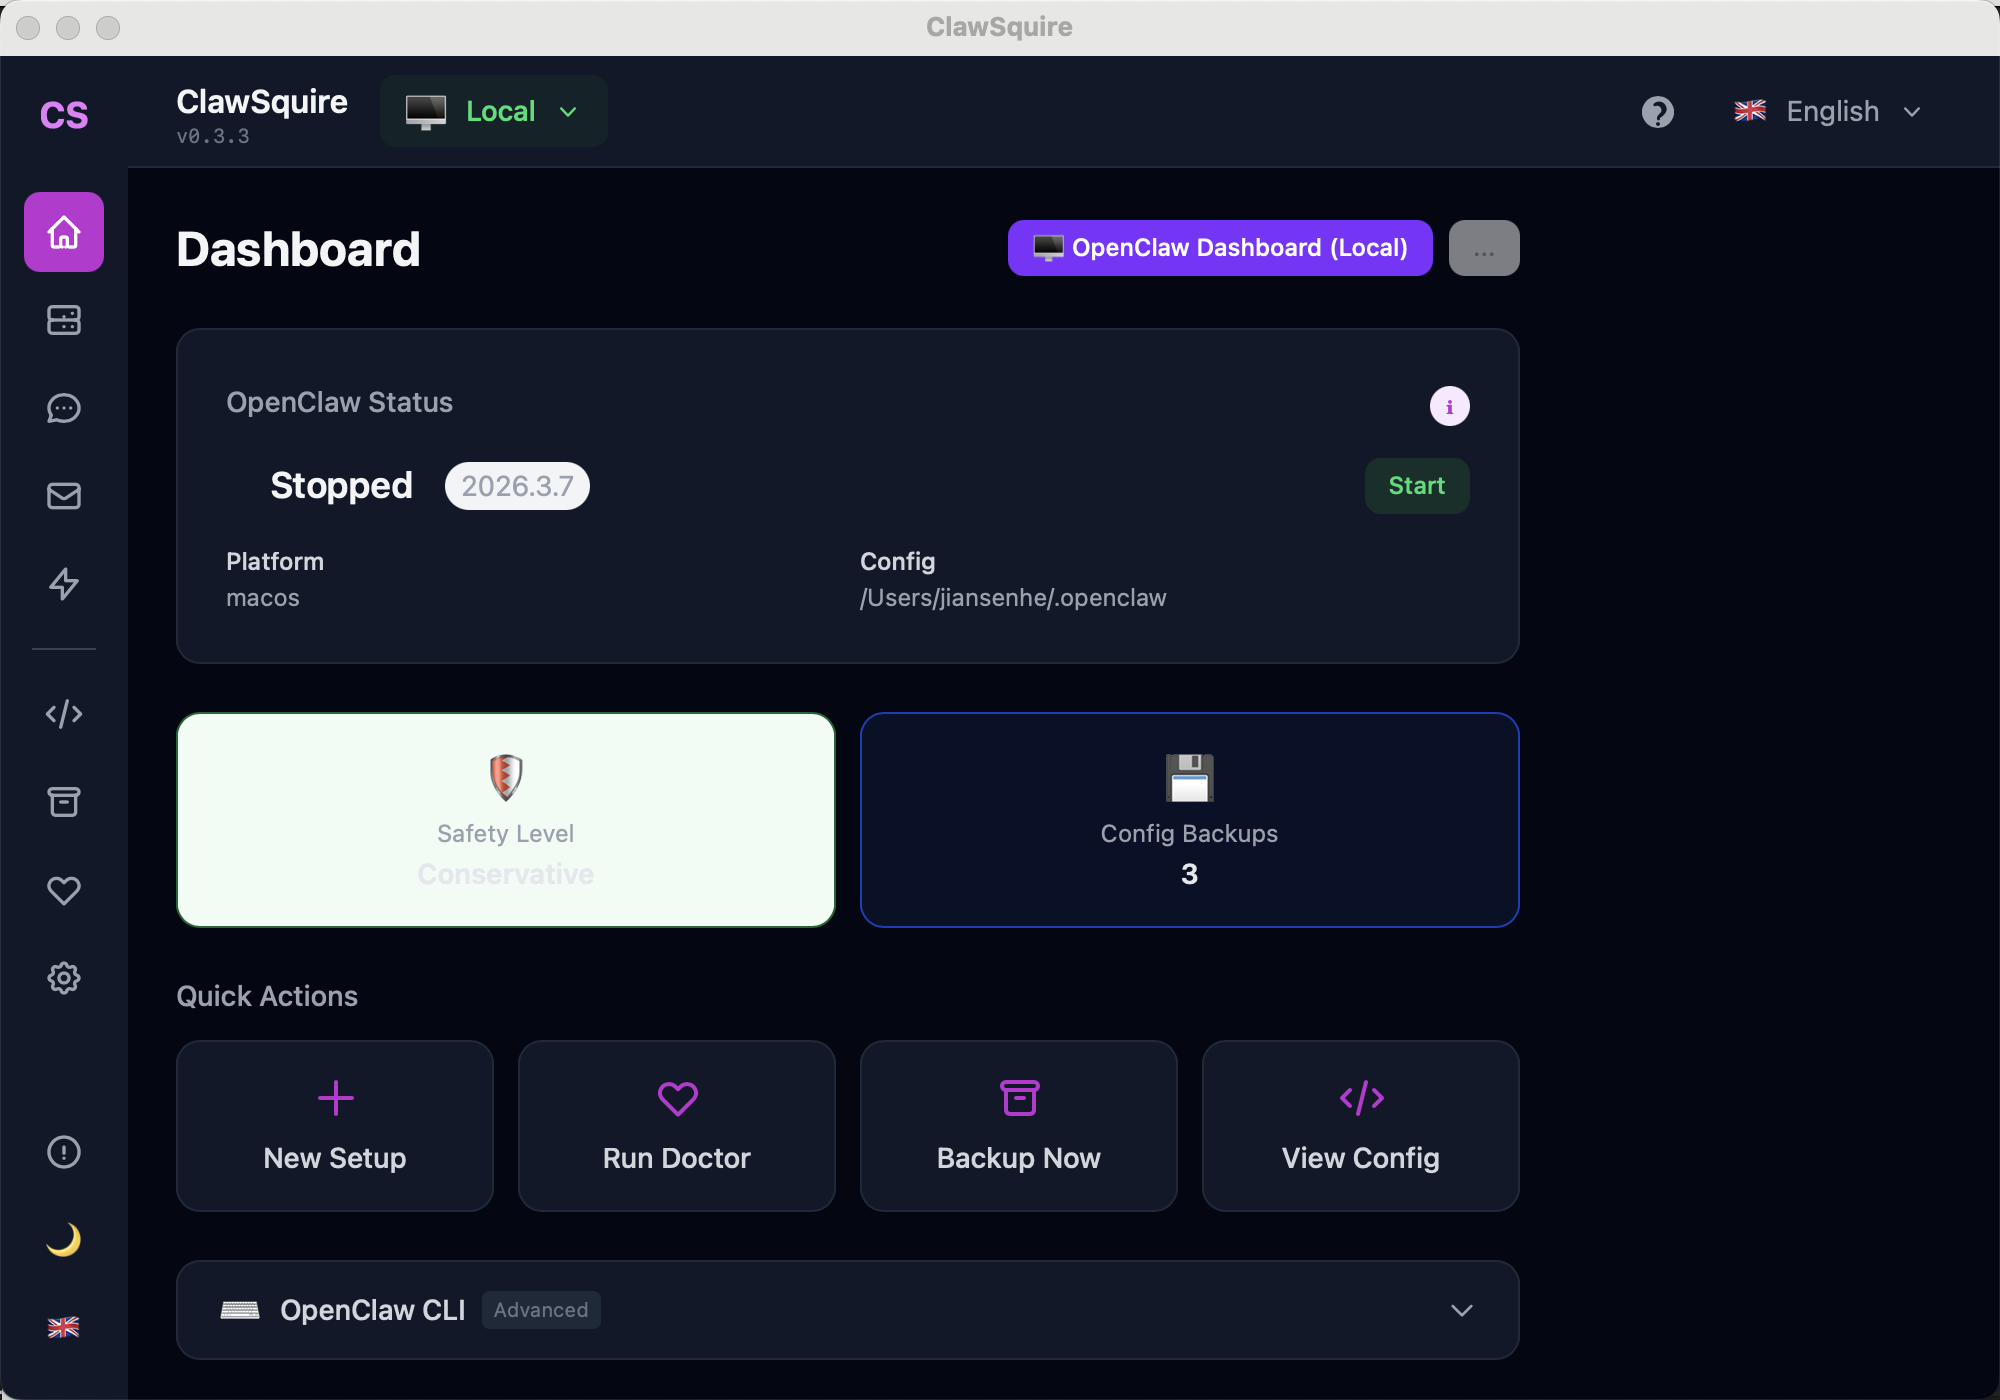
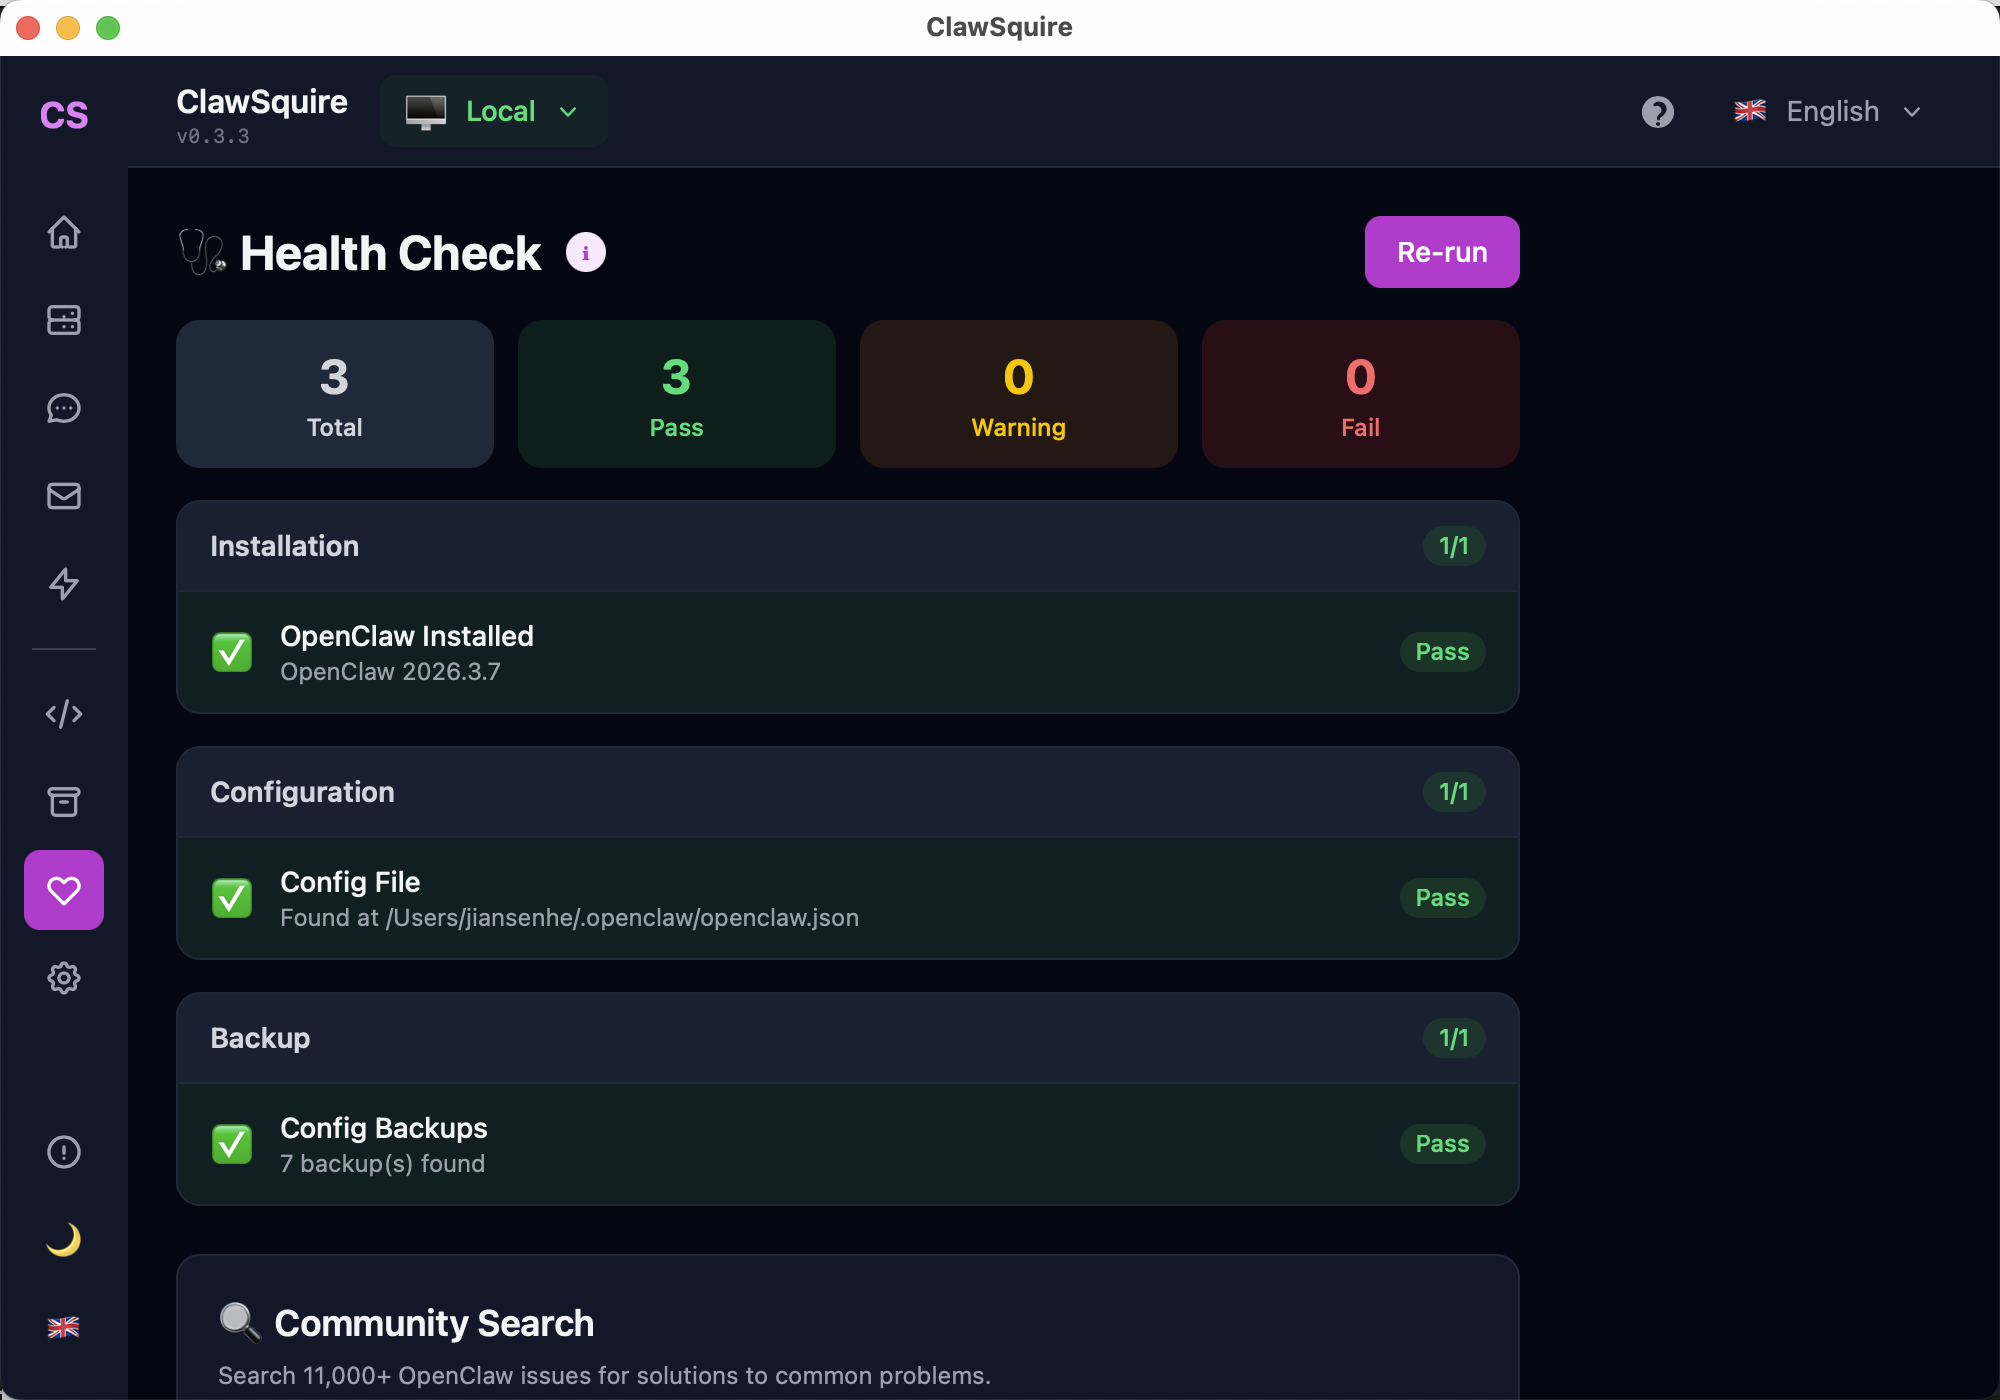
Run Health Check
Use the built-in Health Check to verify everything is working. It checks OpenClaw status, provider connectivity, channel health, and more.
⟩Method 2: Install via Terminal
Manual Alternative
Install Node.js (if needed)
OpenClaw requires Node.js 18 or later.
# Check if Node.js is installed
node --version

# Install via nvm (recommended)
curl -o- https://raw.githubusercontent.com/nvm-sh/nvm/v0.40.0/install.sh | bash
nvm install --ltsInstall OpenClaw
npm install -g openclawVerify the installation:
openclaw --versionRun the Doctor
OpenClaw includes a built-in diagnostic tool:
openclaw doctorThis checks your environment, generates a gateway token, and creates default configuration files.
Start the Gateway
openclaw gatewayThe gateway starts on port 18789 by default. Access the Dashboard at http://localhost:18789.
Configure via Dashboard or CLI
Use the web Dashboard to configure LLM providers, channels, and automations. Or use the CLI:
# Set default model
openclaw config set agents.defaults.model deepseek/deepseek-chat

# Add Telegram channel
openclaw channels add telegram --bot-token YOUR_BOT_TOKEN
After CLI Install: Use ClawSquire for Visual Management
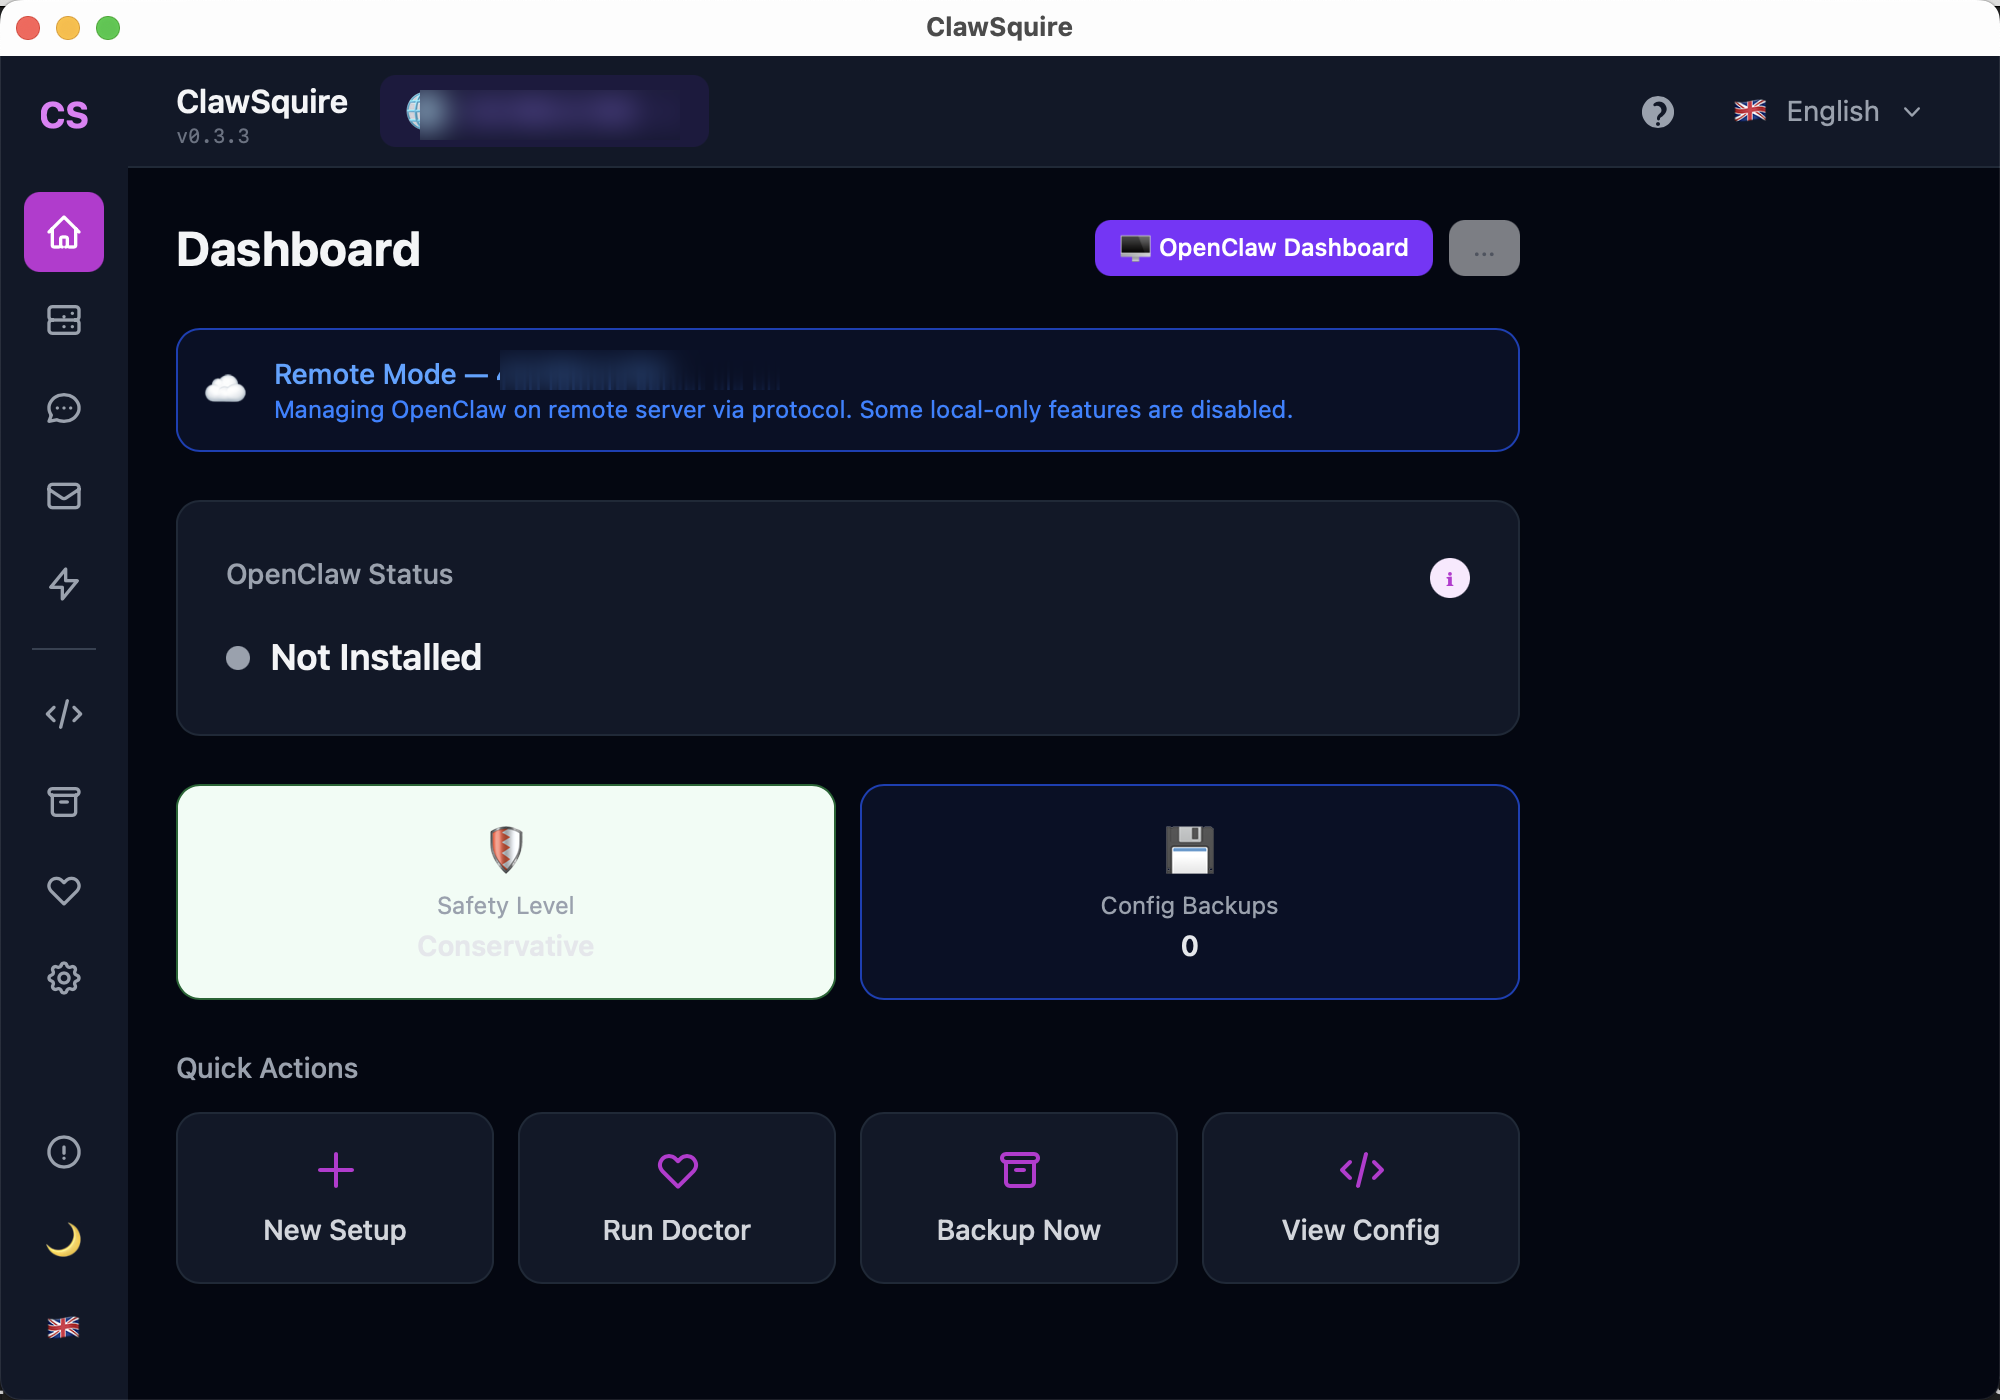
If you installed OpenClaw via the terminal, download ClawSquire to manage it visually. ClawSquire connects to your local OpenClaw or a remote VPS — no more editing config files by hand.
Download ClawSquire — free, for macOS, Windows, and Linux.
What's Next?
- →Try a conversation: Send a message to your Telegram bot and see the AI respond.
- →Set up automations: Create cron jobs to schedule regular AI tasks.
- →Explore skills: Customize your agent with SKILL.md files for specialized tasks.
- →Join the community: GitHub Discussions for questions and ideas.